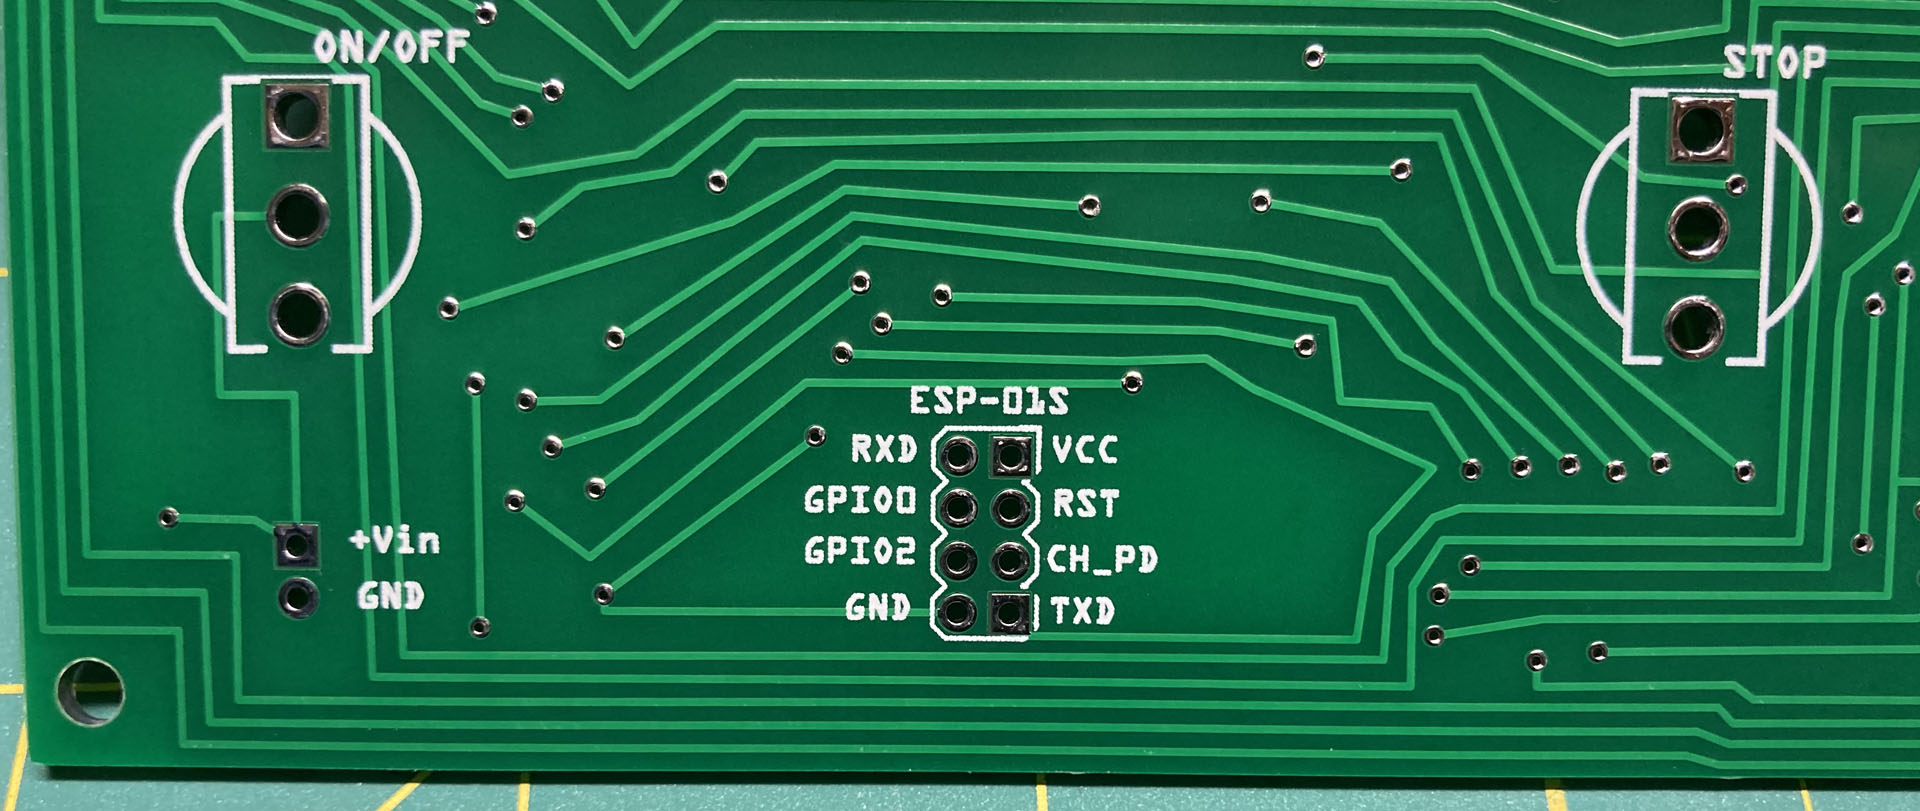
You may have noticed the footprint for the ESP-01 on the circuit board, and several people have asked why it's there. When I made my first Altair-Duino in 2017, I had just finished a project with the ESP-01 (a Wi-Fi module that allows microcontrollers access to a Wi-Fi network). I knew I wanted to add WiFi capability to my new kit, but just could never get the time.
Software Install - Hardware Install (v1.5.2) - Hardware Install (v2.0+) - Operation
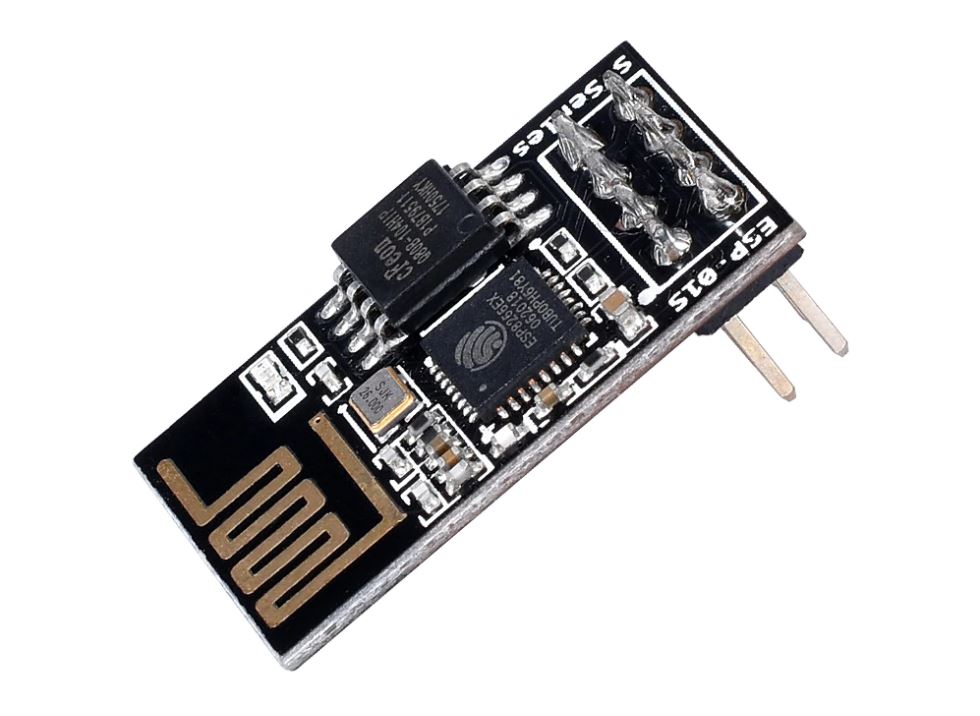
- First you'll need to get an ESP-01s module. Make sure you get the "01s", which is a black module (the original 01 is typically blue.) The ESP-01s has the features and memory we need for this project. You can easily find them on Amazon or eBay.
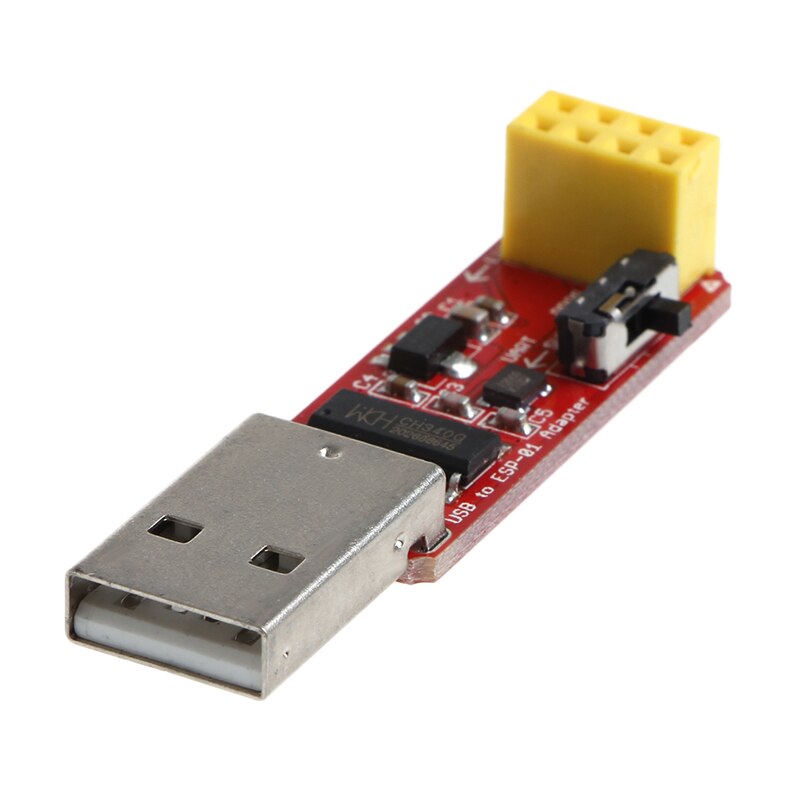
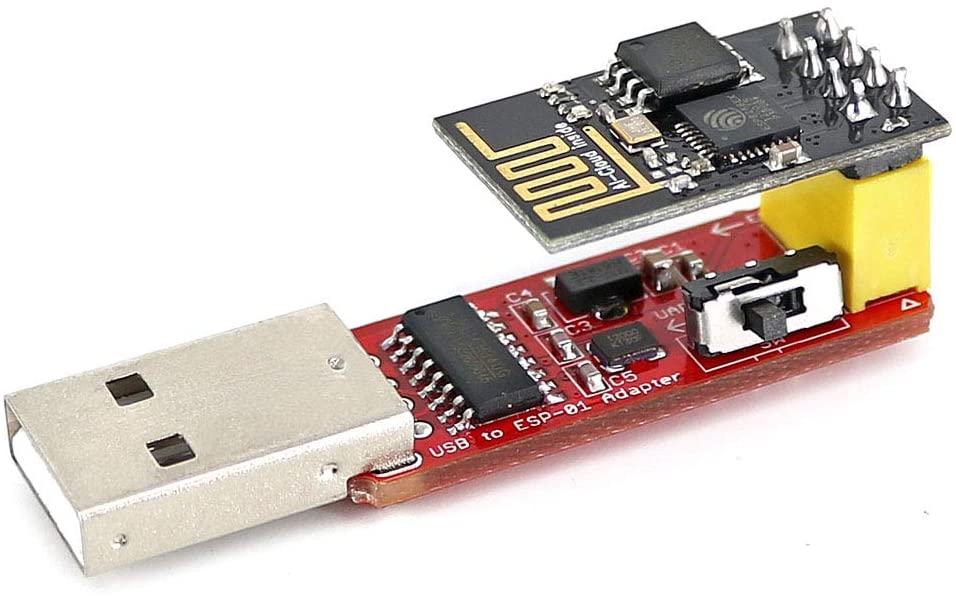
- You're also going to need a method to program the module. You can search and find several ways to use an Arduino and a breadboard to program it, but the easiest way I have found is to buy a programmer made for the ESP-01s. I prefer the "Open-Smart" programmer. It has a switch on the side to select UART or PROG. Again, they're fairly cheap on Amazon or eBay.
- Before you move ahead, you're going to need to update the software in your Arduino. The easiest way would be to install the precompiled binary as explained on this page.
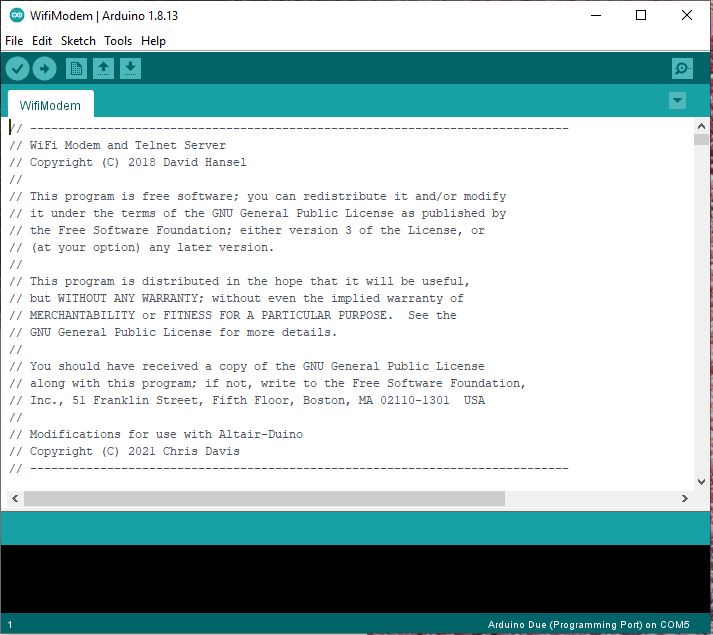
If you want to rebild the software from the original source code, make sure you have set
#define USE_SERIAL_ON_RXLTXL 1
in host_due.h. 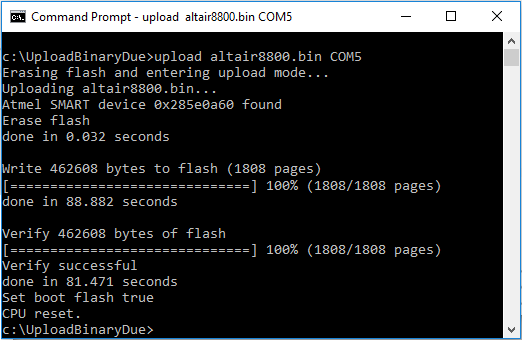
You will also need to get the software installed to the ESP-01s. You can download my project for the Arduino IDE here.
You will need to set up your IDE to work with ESP8266 boards. Here are the steps:
- In the Arduino IDE click on "File -> Preferences".
- Next to "Additional Boards Manager URLs" add this line and click on "ok":
"http://arduino.esp8266.com/stable/package_esp8266com_index.json" - Go to "Tools -> Board -> Boards Manager", search for "esp8266" and install it.
- Go again to "tools -> board" and select "Generic ESP8266 Module".
Download WiFiManager.zip and extract it to your Arduino IDE libraries folder (typically C:\Program Files (x86)\Arduino\libraries) or you can install WiFiManager by tzapu from the Arduino Library Manager (Tools -> Manager Libraries).
You are now ready to build the code and upload it to your ESP-01s using your programmer (or other method.)
If you don't want to muck about with all this you can purchase a pre-programed ESP-01s and 2x4 header here.
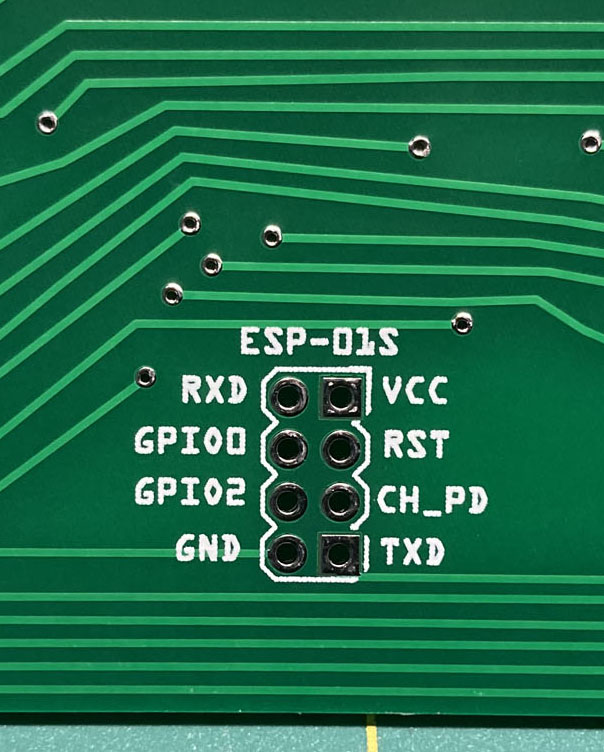
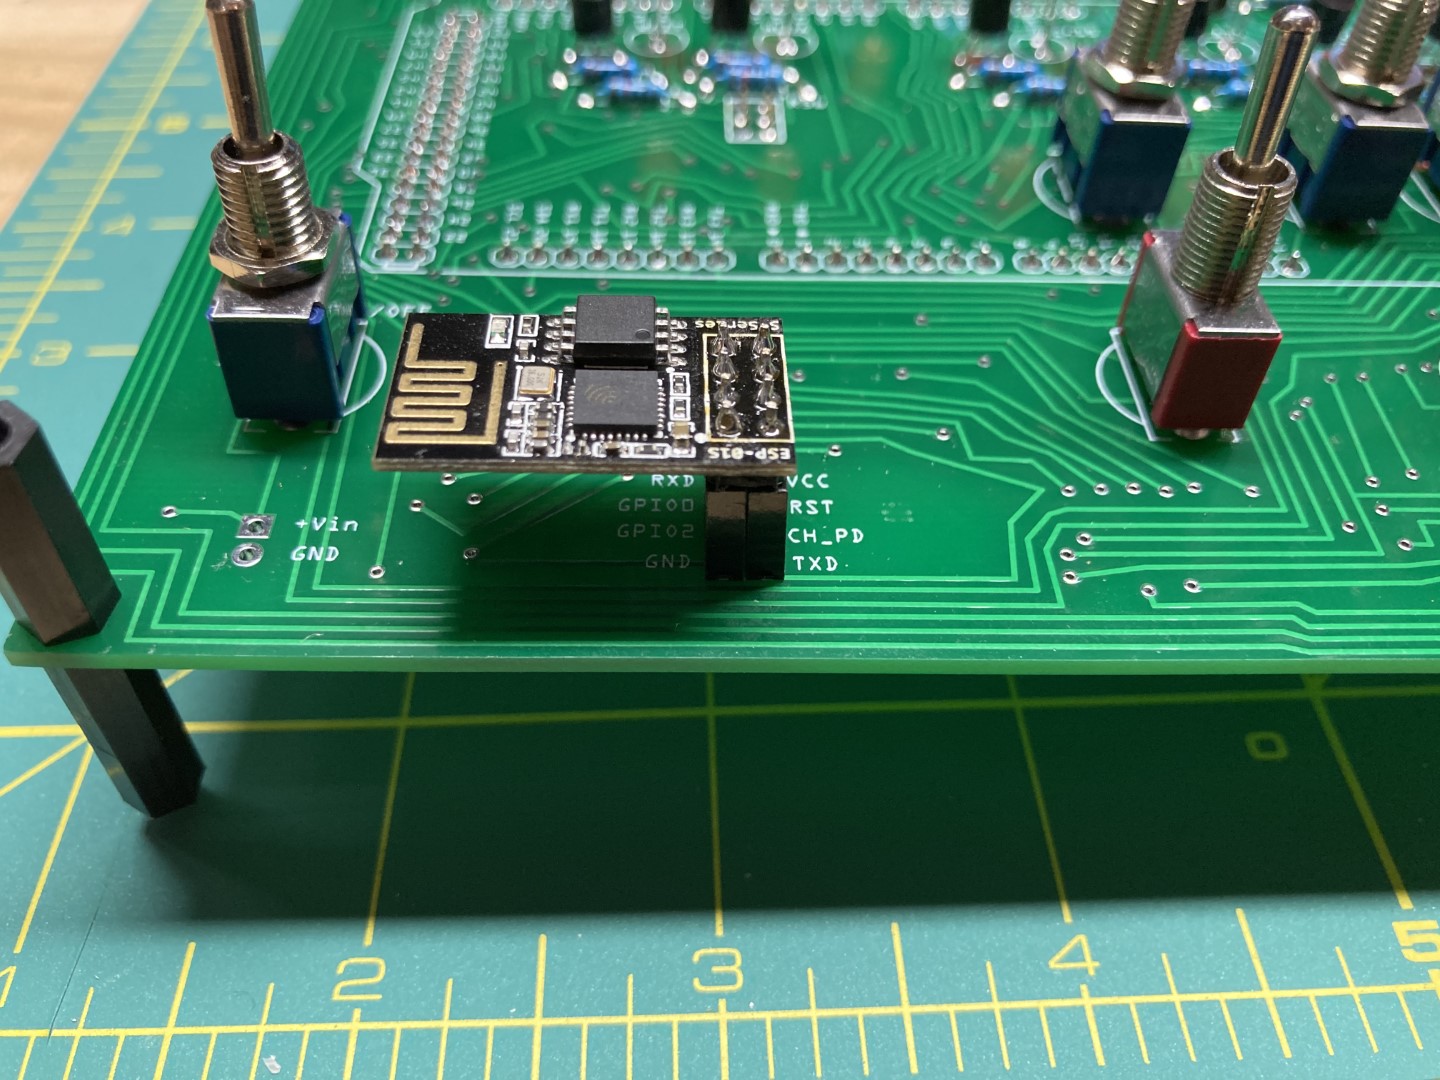
- RXD is connected to pin 18 on the Arduino, and TXD is connected to pin 19. If you have an Altair-Duino Pro, these are the same pins used by the VT100 emulator, if you have an Altair-Duino Standard with a Bluetooth module, these pins are used by that. The following instructions assume you have neither a VT100 emulator or Bluetooth module. If you do, jump ahead to this step.
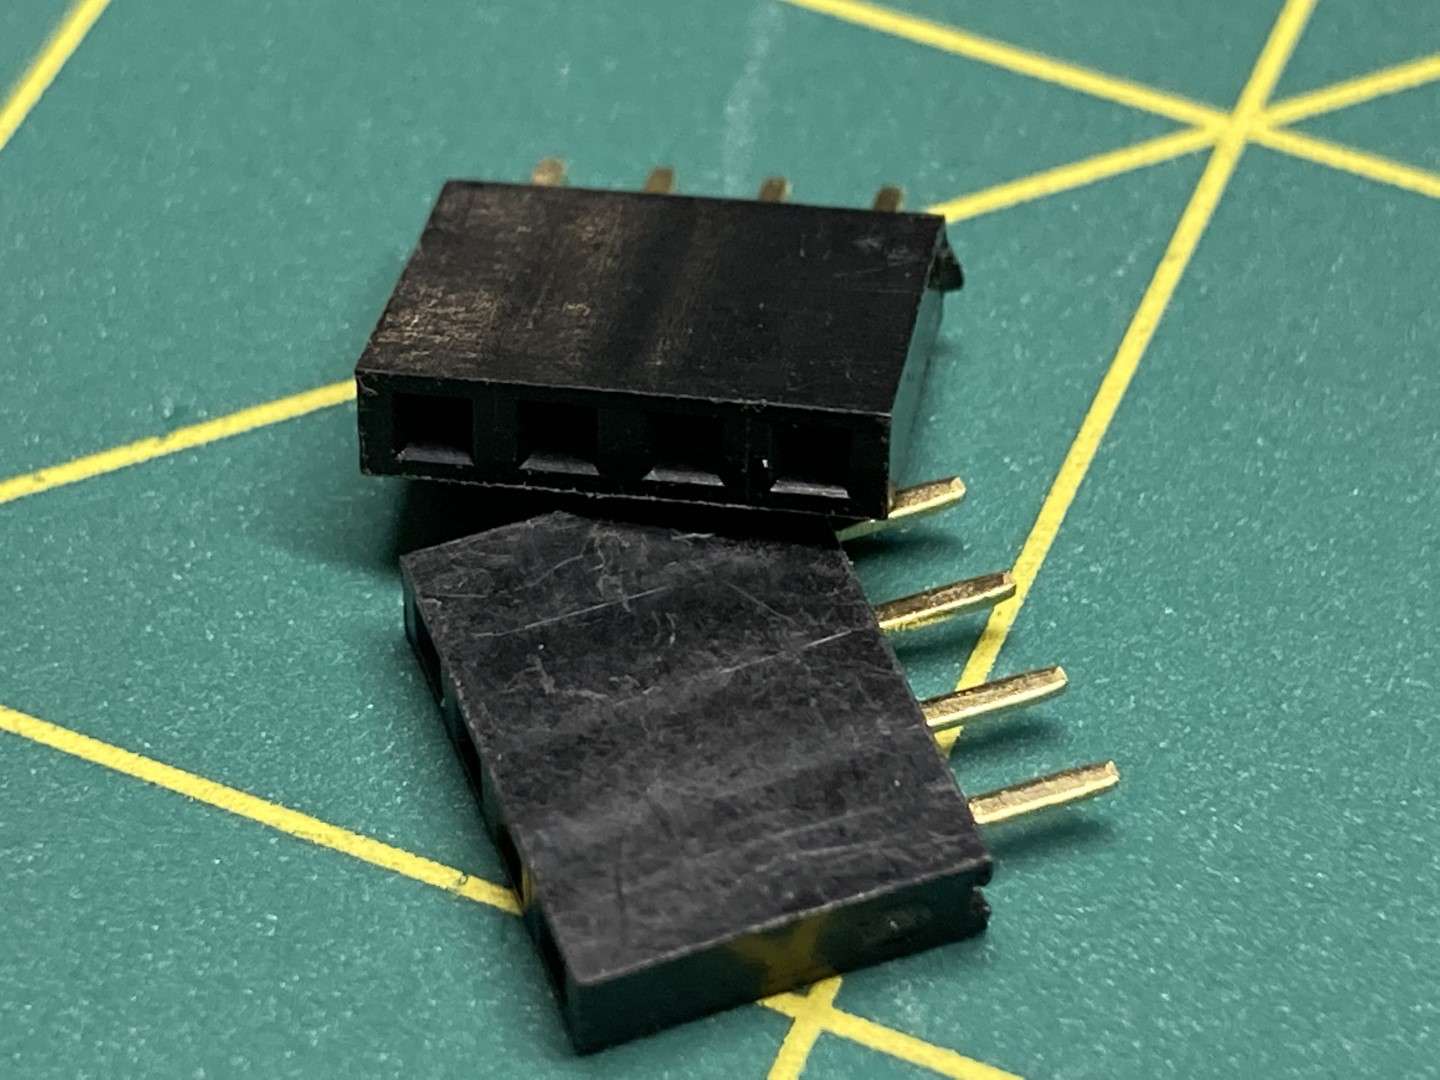
- While you can solder a pre-programmed ESP-01s to the circuit board, I would strongly recommend using a female header connector. a 2x4 connector would be best, but if you only have single-row connectors, you can make due with two four-pin connectors.
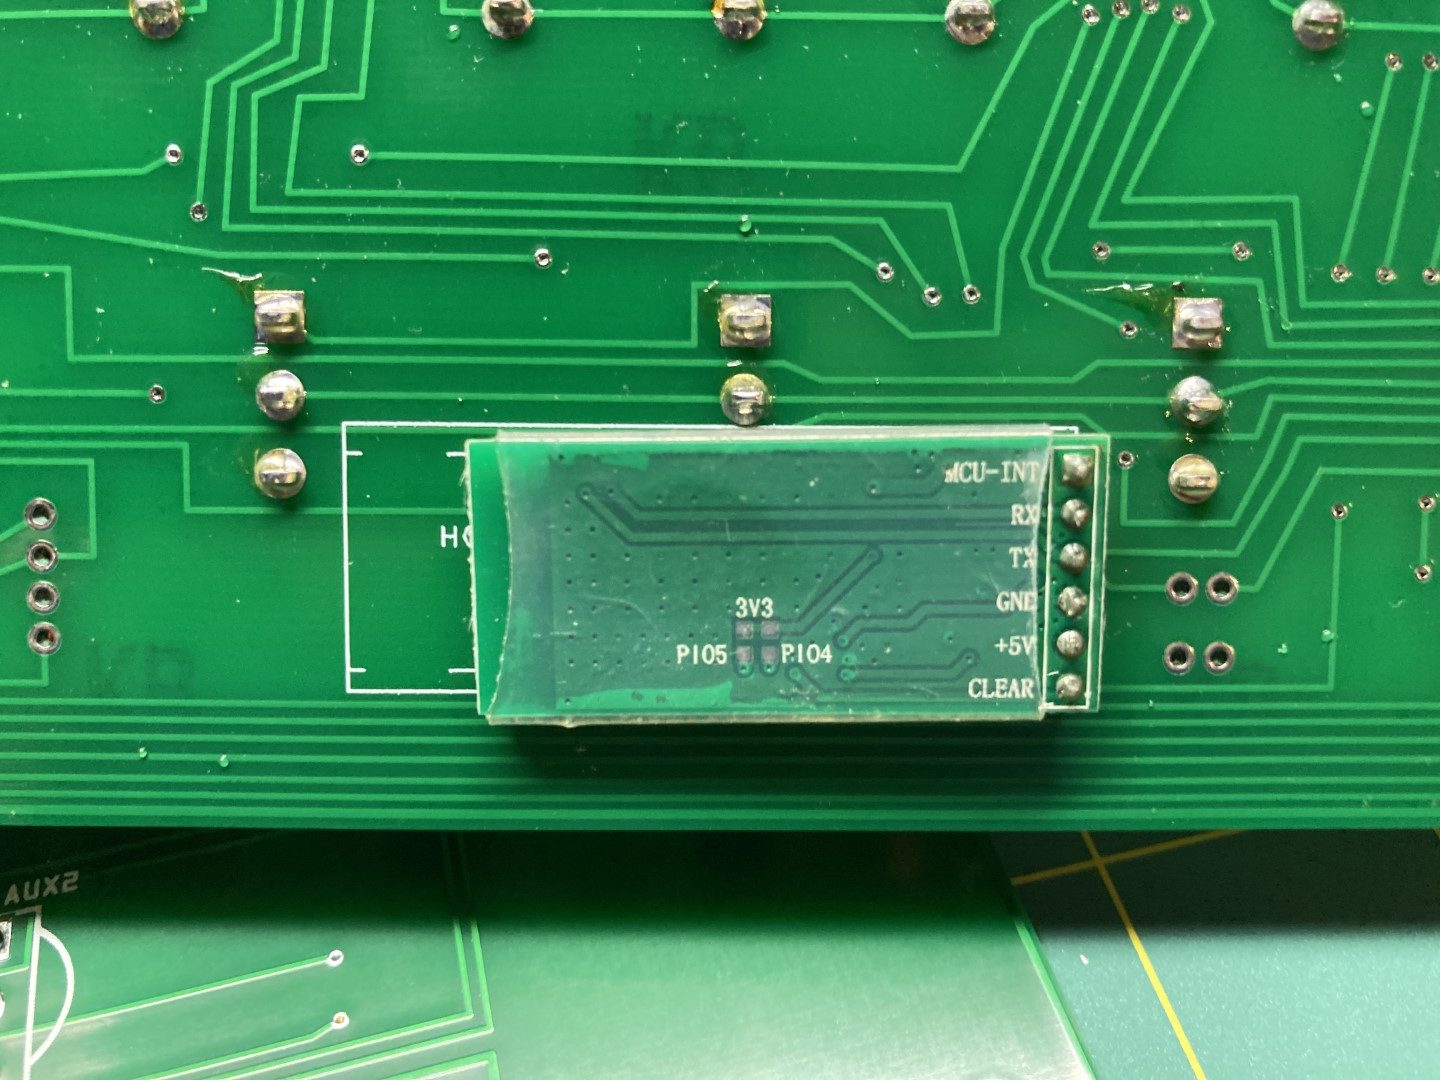
- If you have a Bluetooth module installed, you must remove it. You can either desolder it, or if there's enough clearance you can clip the pins and remove it. If you want to keep your Bluetooth module, you will need to wire the ESP-01s to the RX/TX LEDs on the Arduino. Those instructions can be found here.
Solder the header(s) into the circuit board, and plug in the ESP-01s.
You may need to update your Arduino programming. You can find that information here: Software Install.
That's it! Aren't you glad you purchased the Standard kit?
You can jump ahead to the operation instructions.
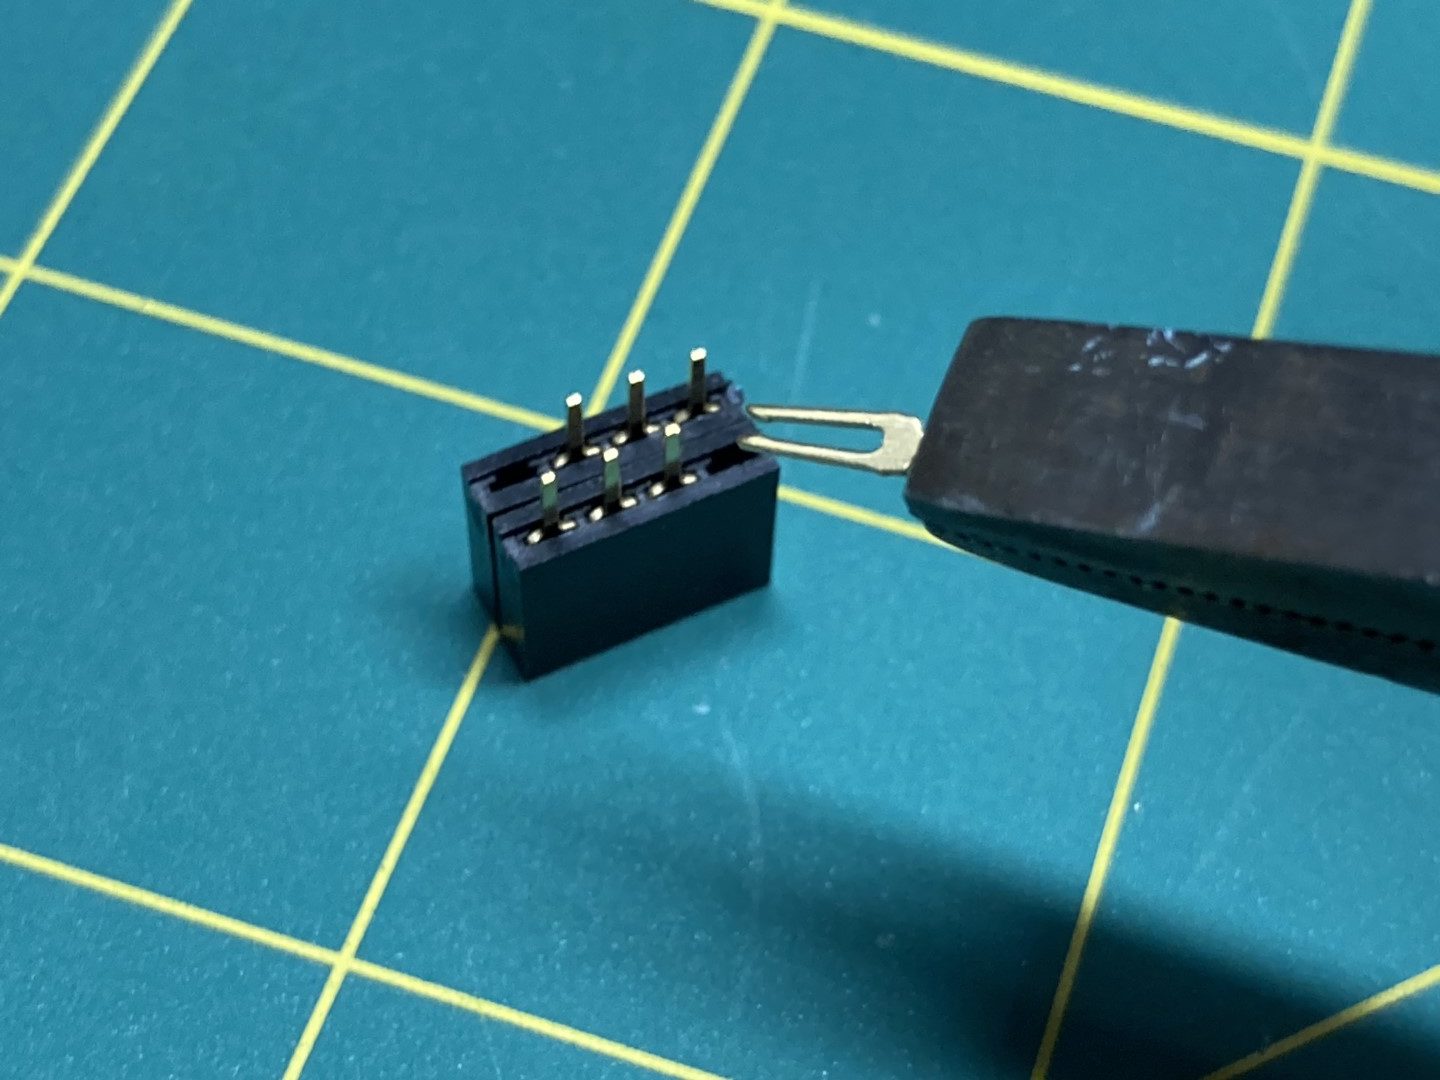
- You have an Altair-Duino Pro v1.5.2, or you want to keep the Bluetooth module in your Altair-Duino Standard? Don't worry, there is another way to include the ESP-01s into your project. First, you need to make sure the ESP-01s does not connect to Arduino pins 18/19. You can do this by removing the header connectors for the RXD and TXD pins. Just pull them out with a pliers.
- Solder the header to the circuit board and install the ESP-01s. You're not finished yet, and find the smallest soldering tip you have.
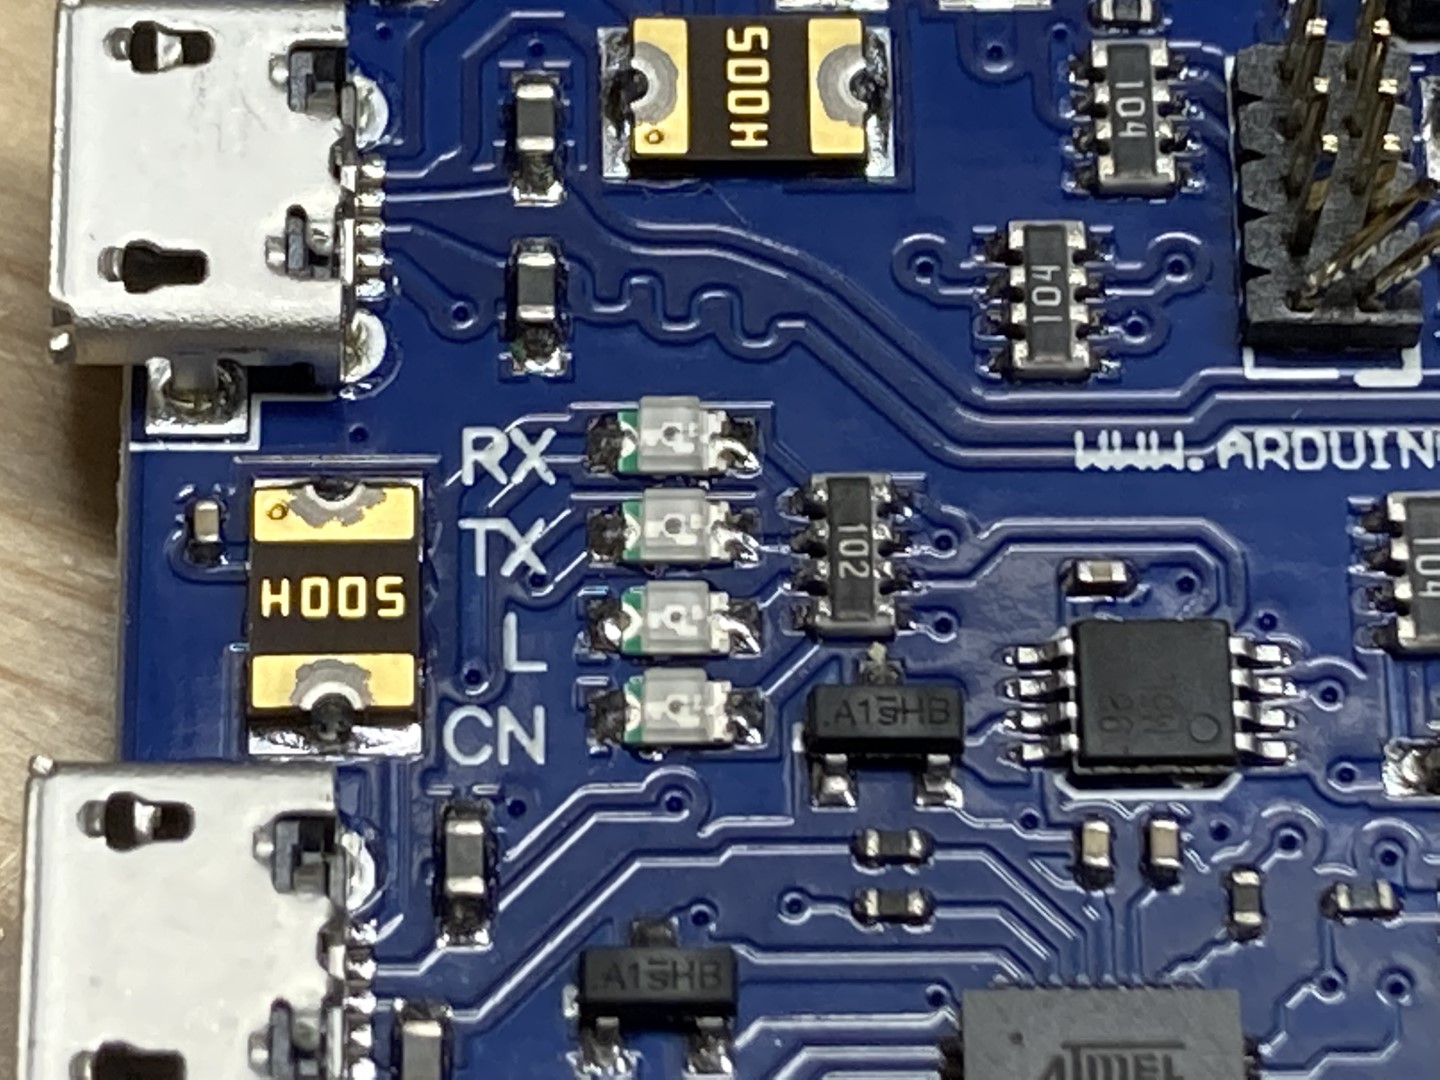
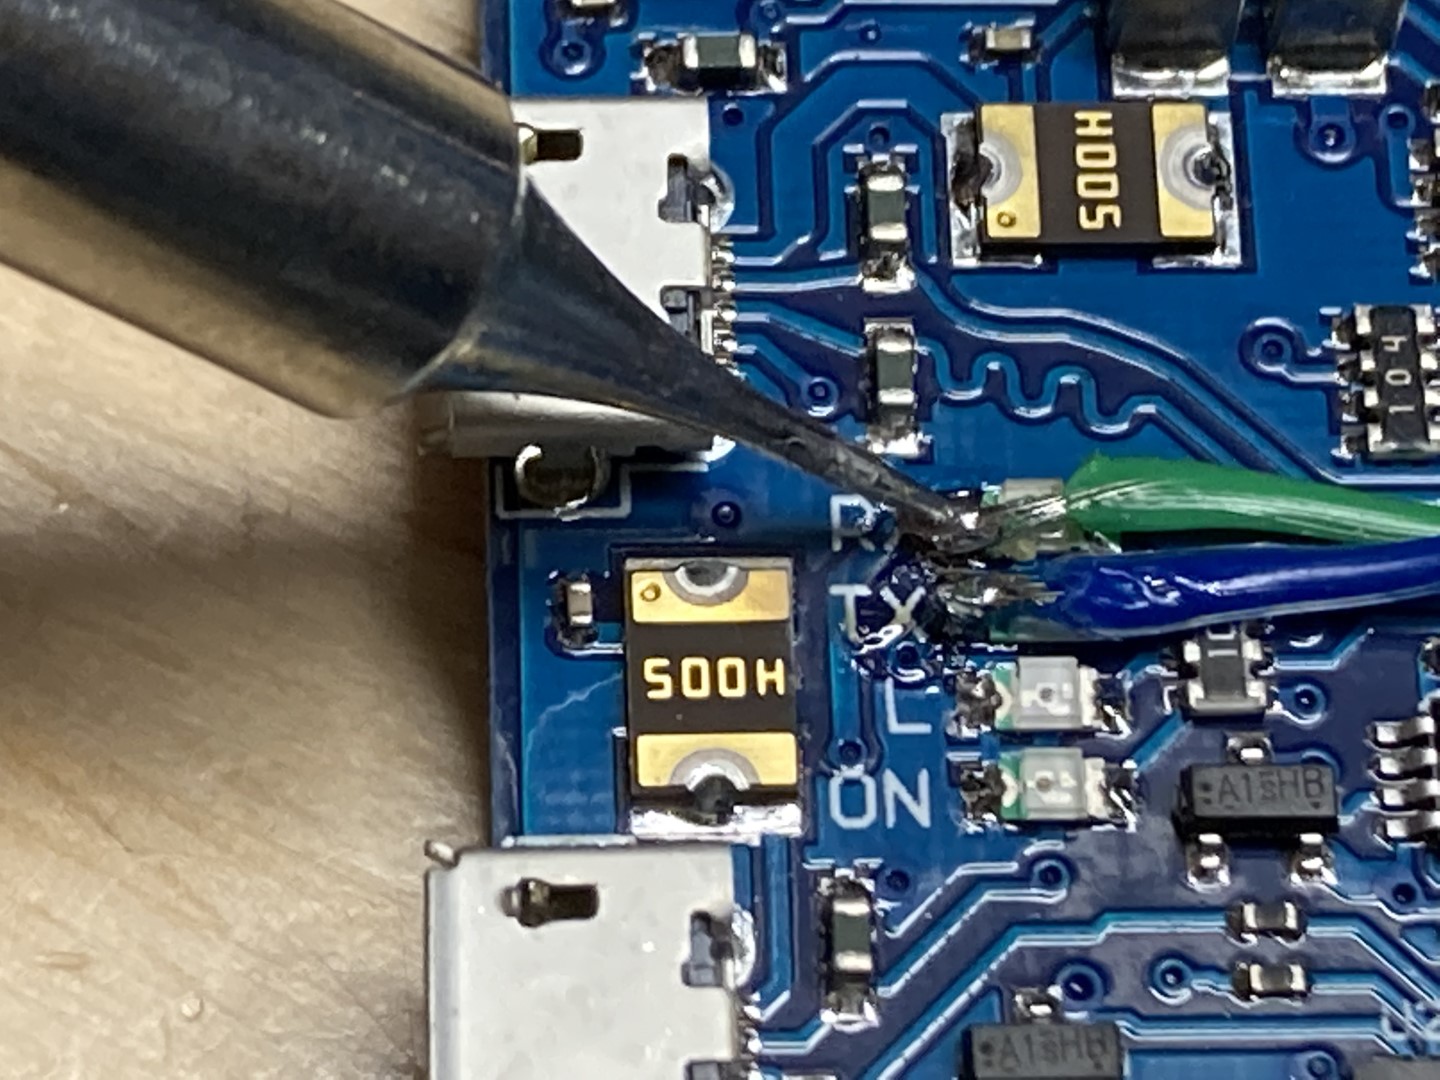
- Solder wires to the left side of the LEDs. You can remove the LEDs it you prefer, but it's not necessary.
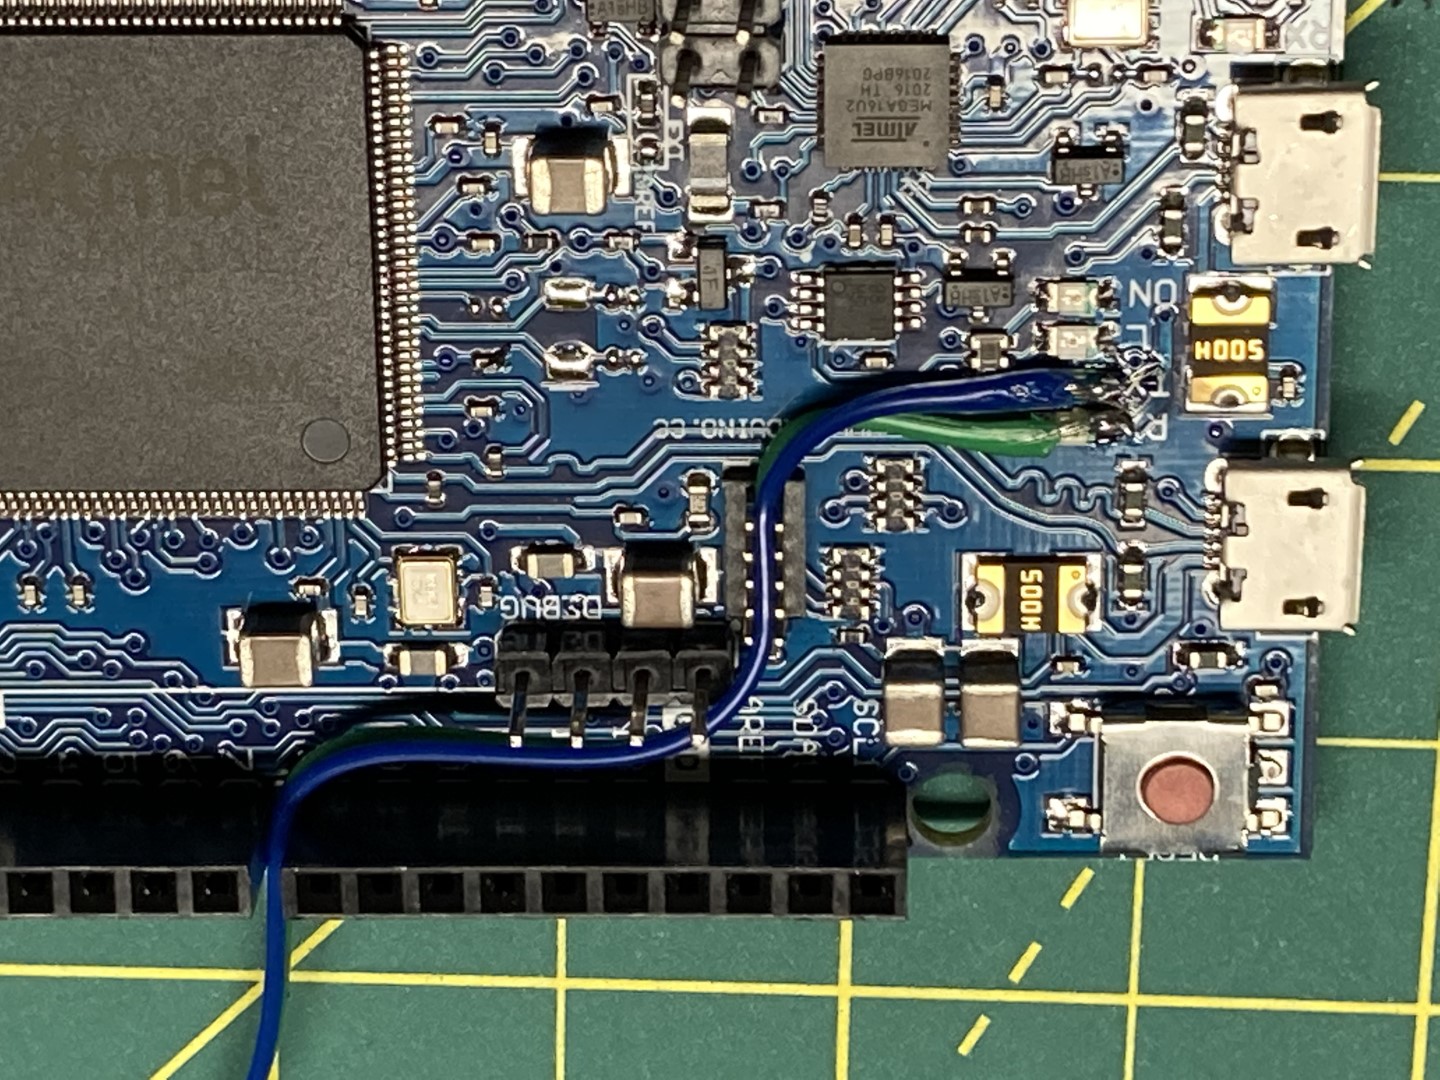
- I like to route the wire through the middle of the JTAG connector and out between pin 7 and 8 to provide a bit of strain relief. Remember your wire colors (which is soldered to RX and which is soldered to TX) you will need that next! You can put the Arduino back in place on the main circuit board.
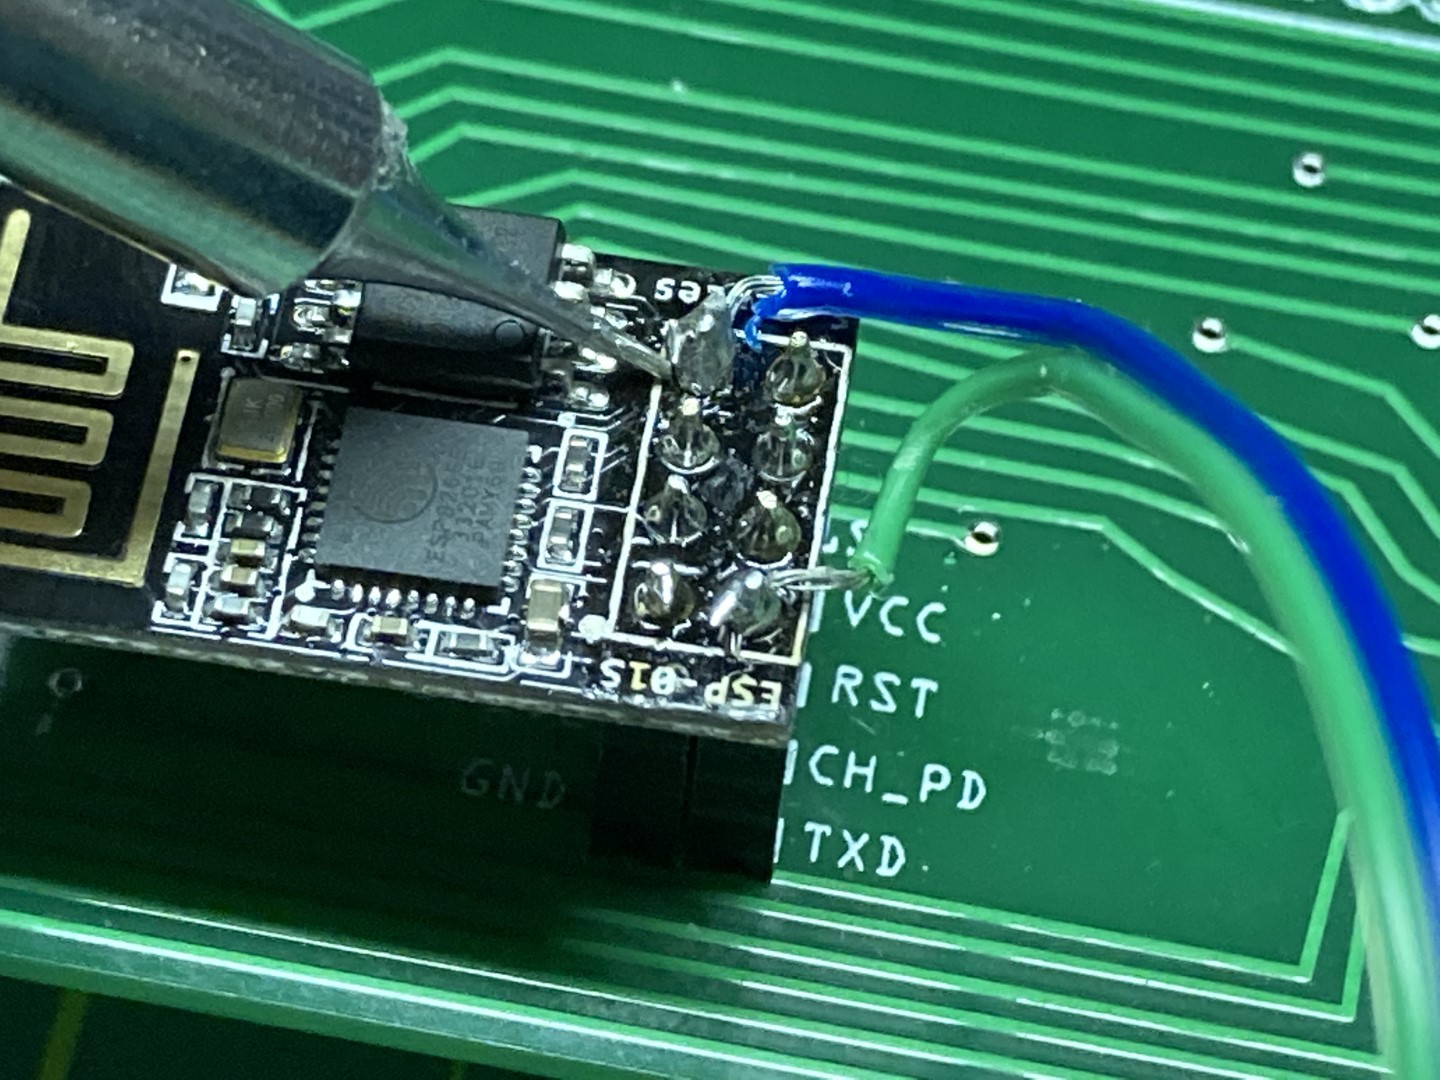
You are going to solder the wire from the RX LED on the Arduino to the TXD pin on the ESP-01s, and likewise, the wire from TX on the Arduino to RXD on the ESP-01s.
Now you can put everything back together.
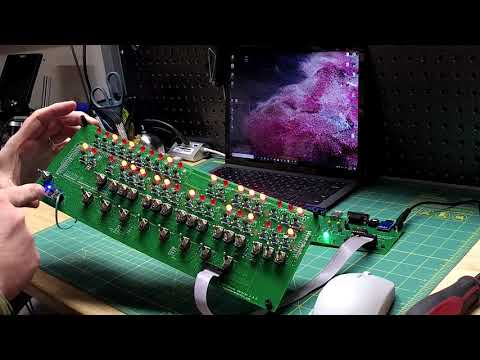
A video is available where I add WiFi to an Altair-Duino Pro: https://youtu.be/kFo27CmqcBY
You may need to update your Arduino programming. You can find that information here: Software Install.
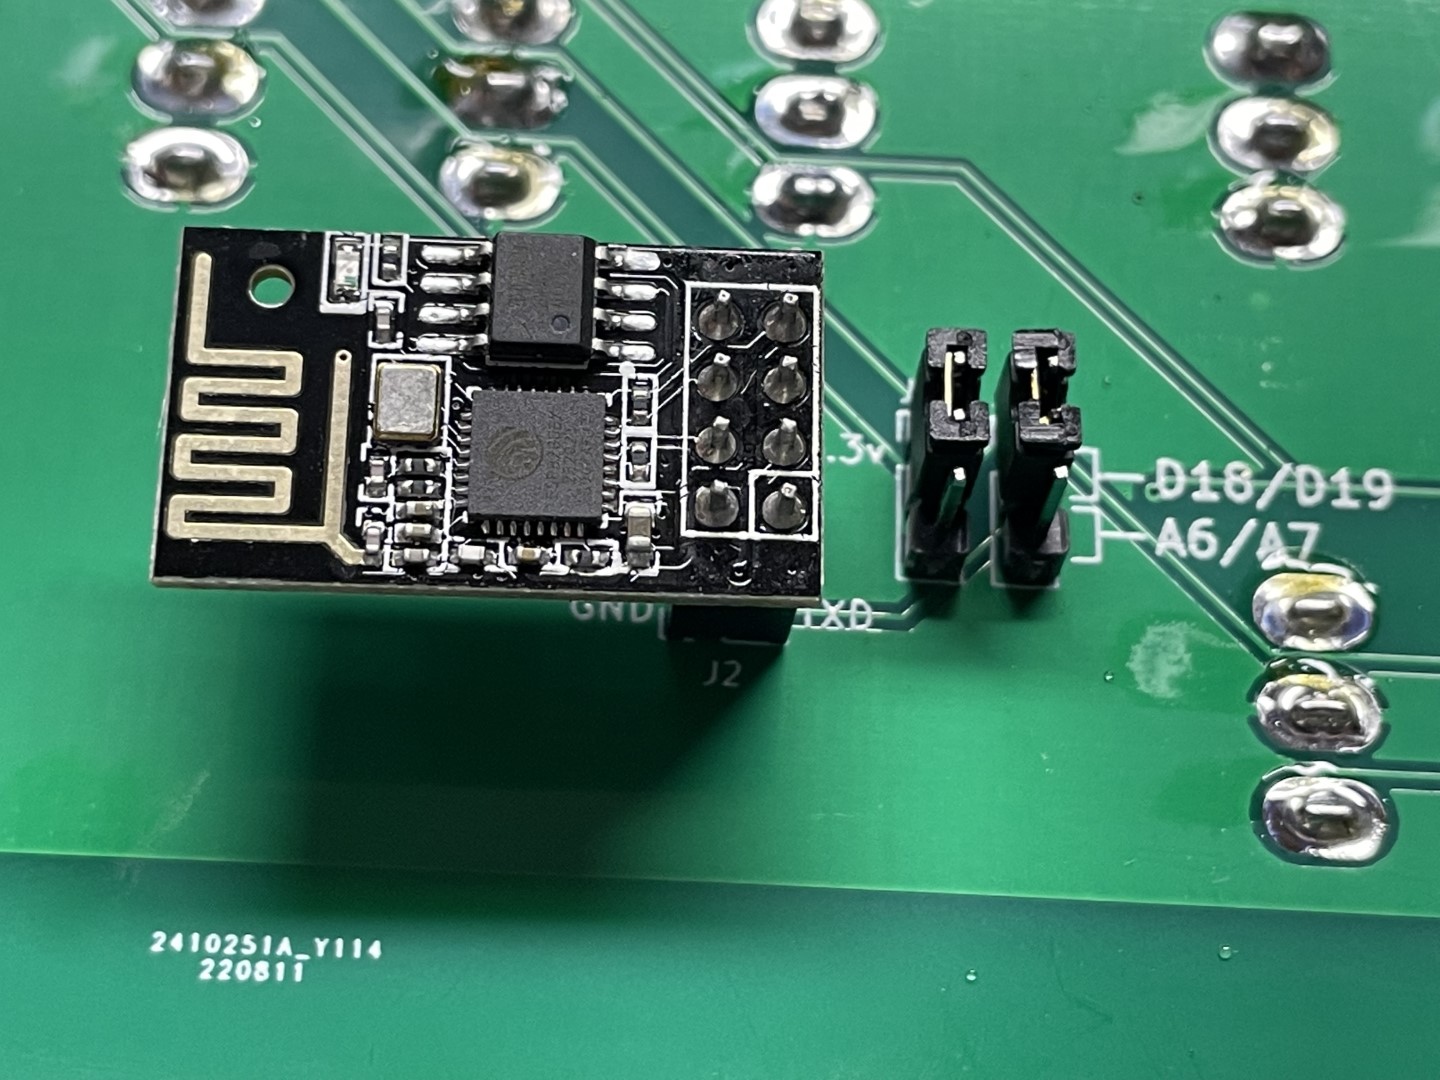
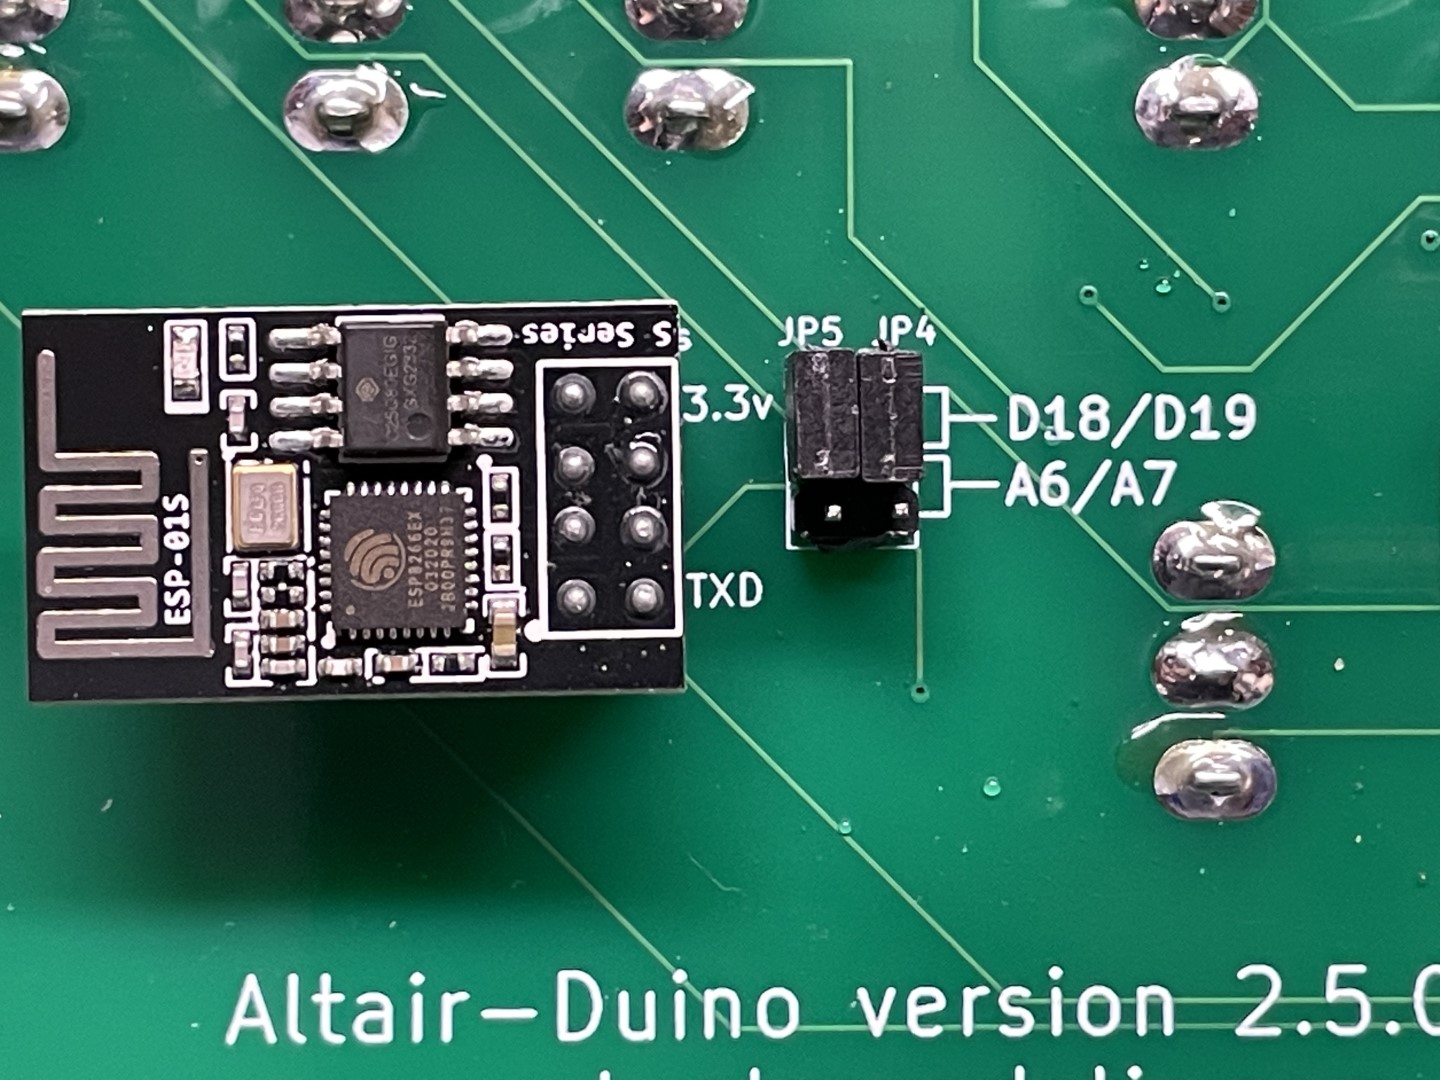
- Version 2.0 of the main circuit board has a new location for the ESP-01s on the rear of the board. Next to the mounting location is a place for two sets of jumpers allowing you to select using the A6/A7 pair or 18/19 pair.
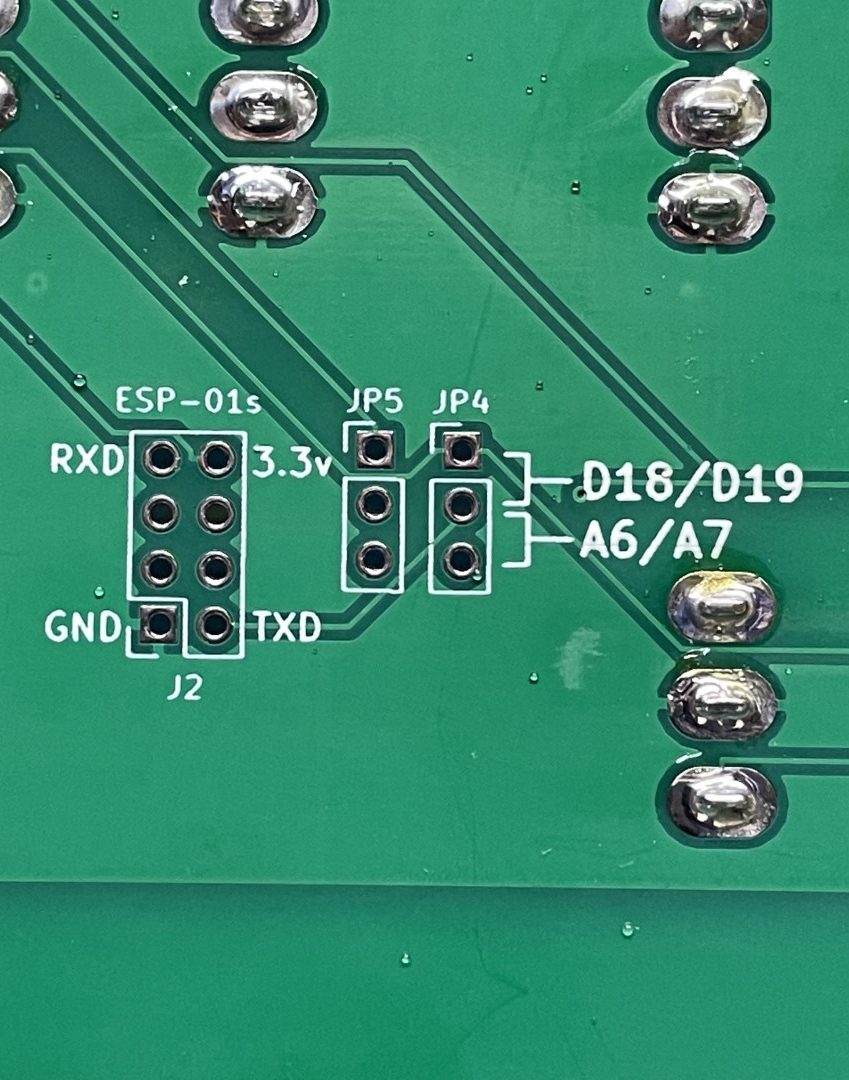
- Using pins 18/19 (as pictured) will require you to remove the PIC32 controller on the expansion board, and you will lose the VT100 emulation. Using pin A6/A7 will require the removal of the SP3232 chip from the expansion board, and you will lose the DE9 serial capability.
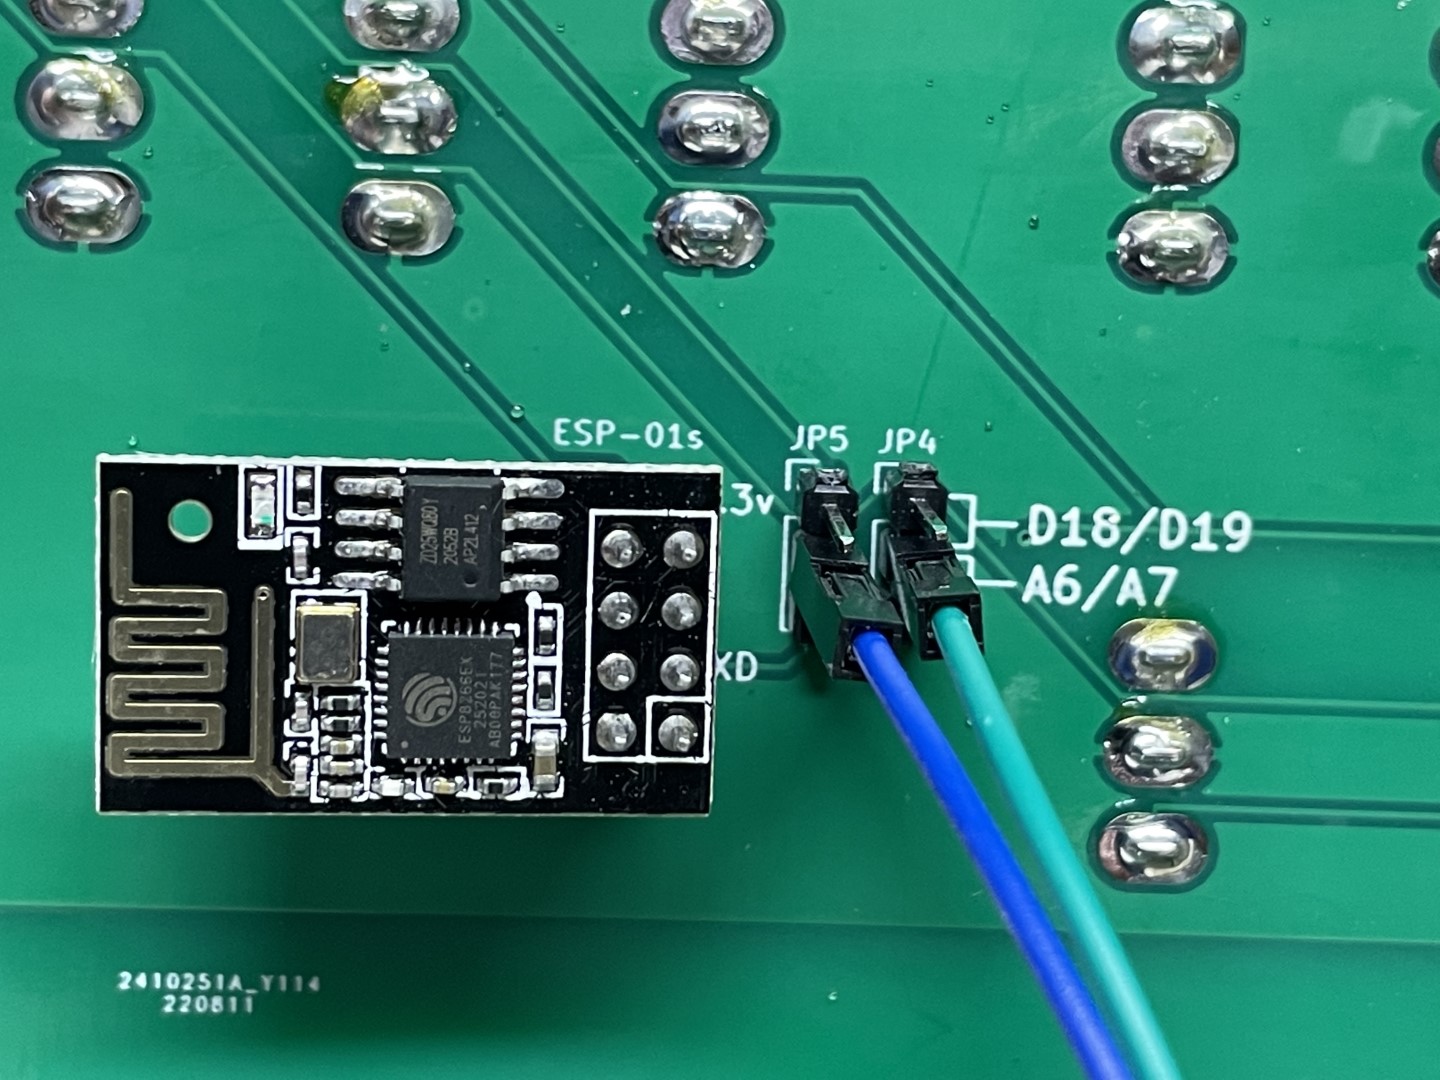
If you would like to wire the ESP-01s to the RX/TX LEDs on the Arduino, you can do so and connect the RX LED to the center pin of JP4 and the TX LED to the center pin of JP5.
Instructions for connecting to the RX/TX LEDs are in the secton above.
If you have a version 2.5+ of the Experimenter, or version 3.0+ of the Pro, you will need to decide which port you want to make available. If you want to use D18/D19 you will need to remove the PIC32 chip and lose the VT100 emulator. If you want to use A6/A7 you will need to remove the SP3232 chip and lose the DB9 serial port.
If you can't bear to lose either, you will have to connect your ESP-01s to the RX/TX LEDs as described in the secton above.
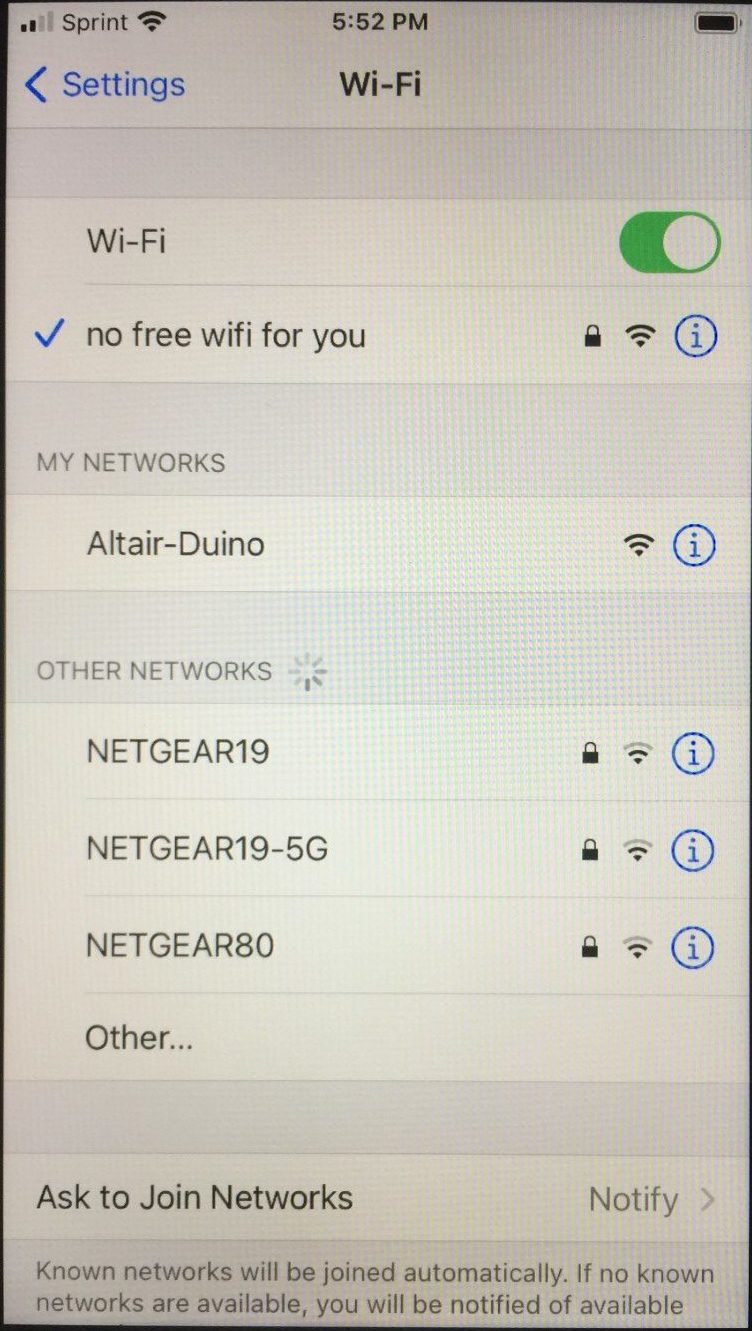
- Now that your hardware and software is set up, let's turn on your Altair-Duino. Give it 30 seconds or so to get set, and launch the WiFi selector on your phone or computer. You'll see there is a new WiFi signal called "Altair-Duino".
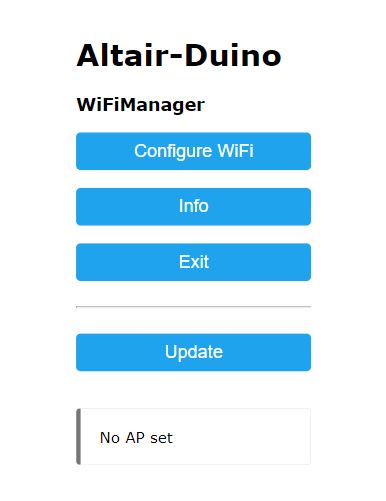
- When you select that network, you will be directed to a captive portal to select your WiFi network. Click "Configure WiFi". If you do not see this page, you can go to a browser and navigate to 192.168.4.1.
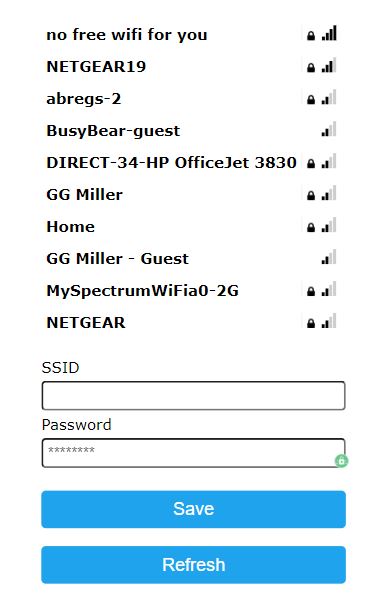
- Select your WiFi network and enter your password. Click "Save", wait 30 seconds or so, then turn off your Altair-Duino.
Restart your Altair-Duino. Open a browser and try to connect to "altair.local". Did it work? Consider yourself lucky, because while it should work, it does not work on my home network!
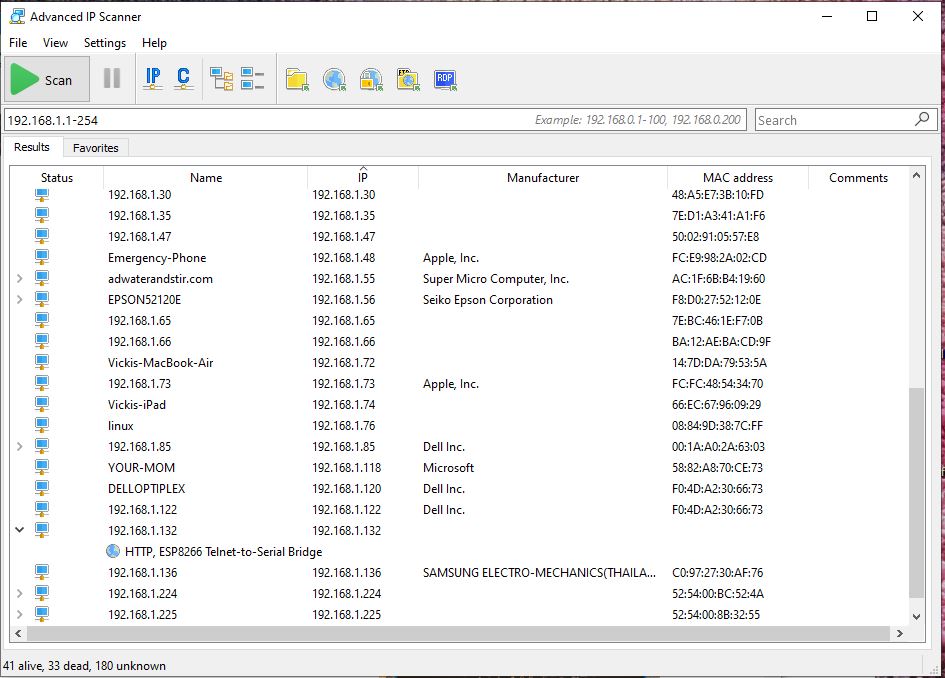
If it doesn't work for you, download a free utility called Advanced IP Scanner. This will scan your network for connections.
- What you're looking for may display a manufacturer of "Espresif Inc", but it may not. It should also show a ">" next to it indicating there is a service. When expanded, it should display "HTTP, ESP8266 Telnet-to-Serial Bridge". Remember this IP address.
- You can restart your Altair-Duino, if desired you can load a saved configuration through this process, or you can manually set up the serial connection through this process. If you would like to use my pre-configured saved profiles (where 01 is using pins 18/19, 02 uses pins A6/A7, and 03 uses the RX/TX LEDs) you can download my SD card image here and install it to an SD card.
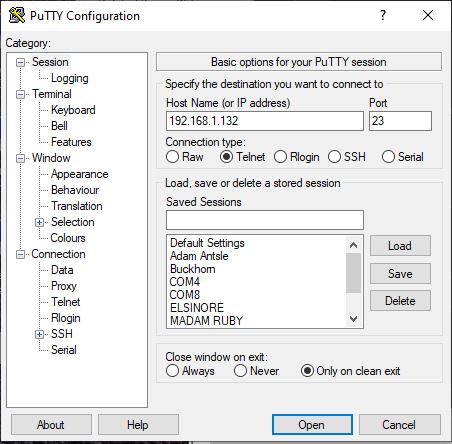
- Open Putty and select a connection type of Telnet. Enter the IP address.
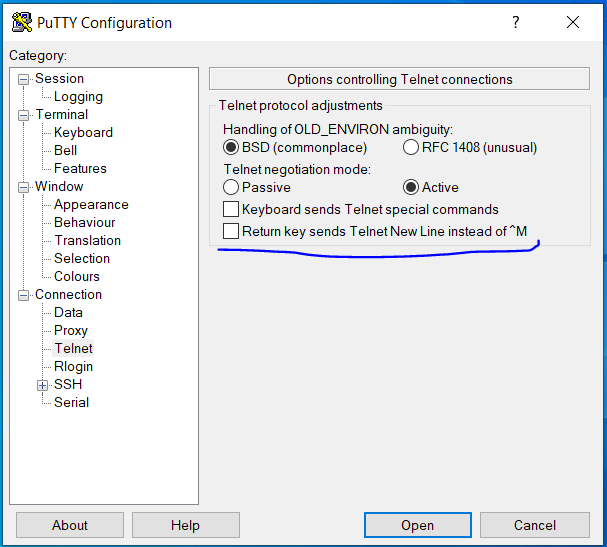
- You will also want to go to the category named Connection > Telnet and uncheck "Return key sends Telnet New Line instead of ^M". You can now click Open. You will have a connection open to your Altair-Duino.
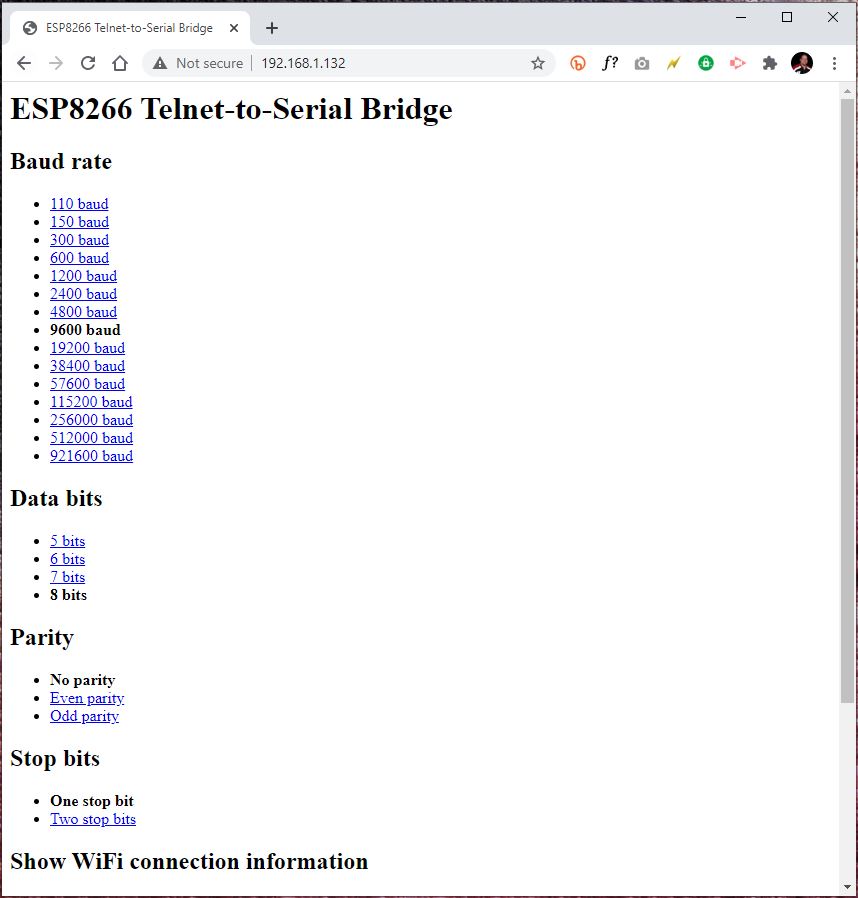
- There is a web interface available at that IP address if you would like to examine the settings. The very last item in the list is "Reset Wifi Settings". You can use this to delete the connection to your home WiFi. If the Altair-Duino can no longer find your WiFi network, for example if you take your Altair-Duino to another location, you can set it up with a different WiFi by connecting to the "Altair-Duino" WiFi network manager again.
Want to know more? Watch this video: