Altair-Duino Pro Emulator Kit
$479.95
Welcome visitors from Linus Tech Tips! If you’re looking for the Altair-Duino Pro (Altair replica), the next batch of cases are in production at the manufacturer. Fingers crossed – I hope to have them by July or August. Please sign up below for an automated email when they are ready to order.
This is typically sold in kit form, but assembled units will also be available. If you’re looking for the case only, that is available here.
Out of stock
Receive an automated email when stock is available
Description
Here’s the all new Altair-Duino Pro version 3.0!
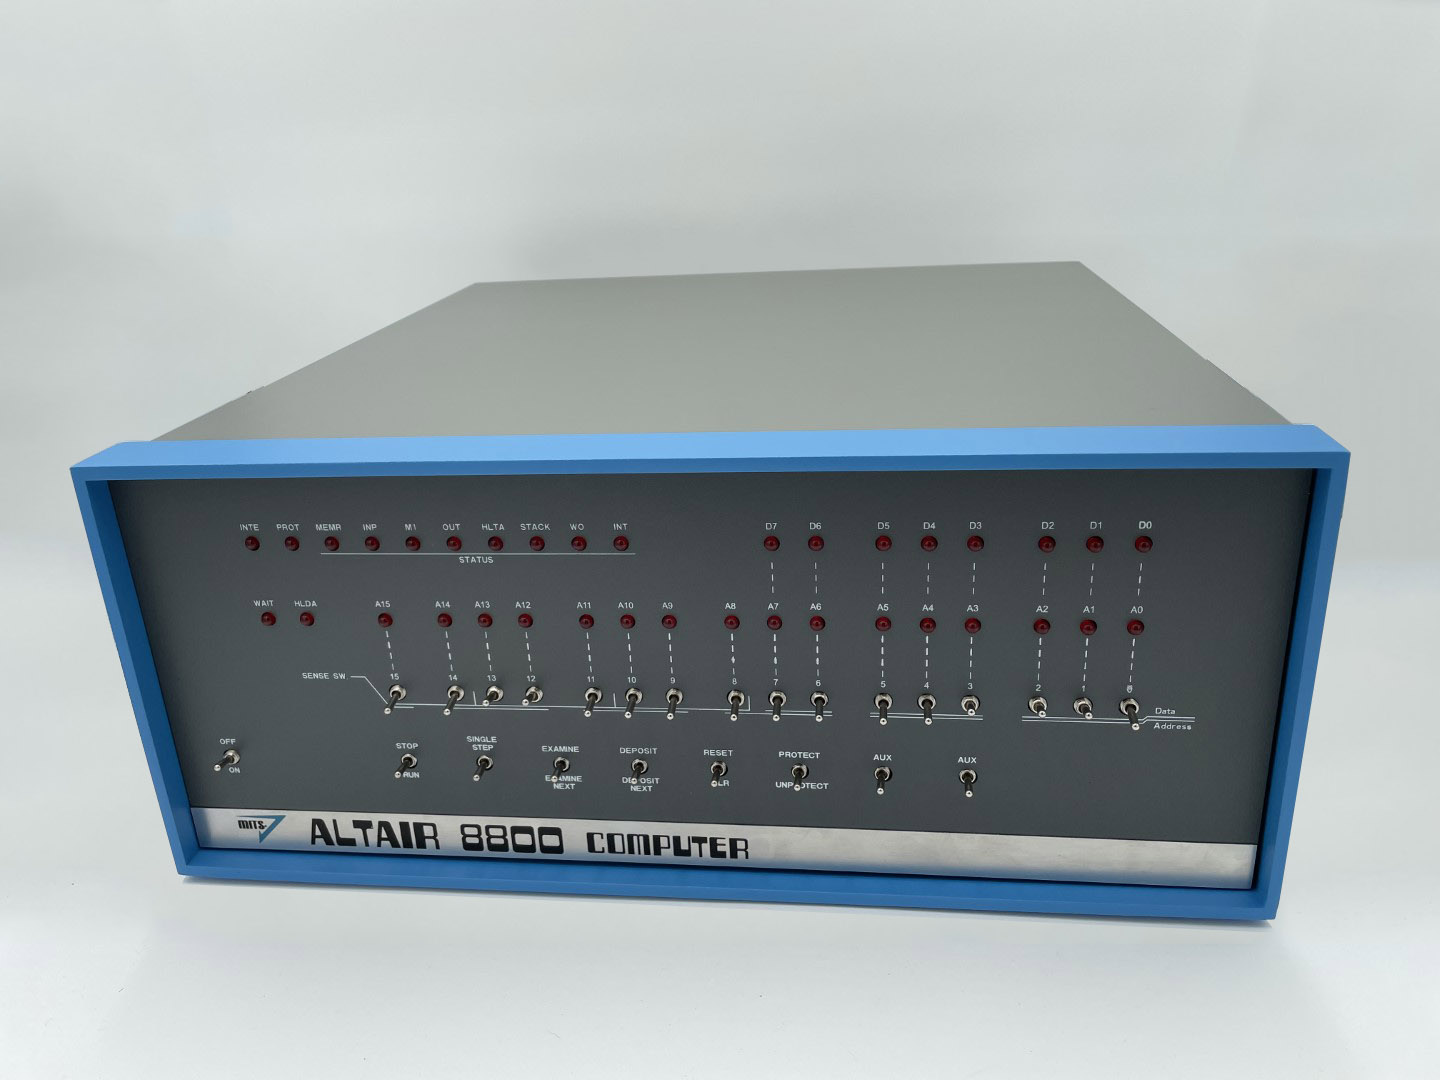
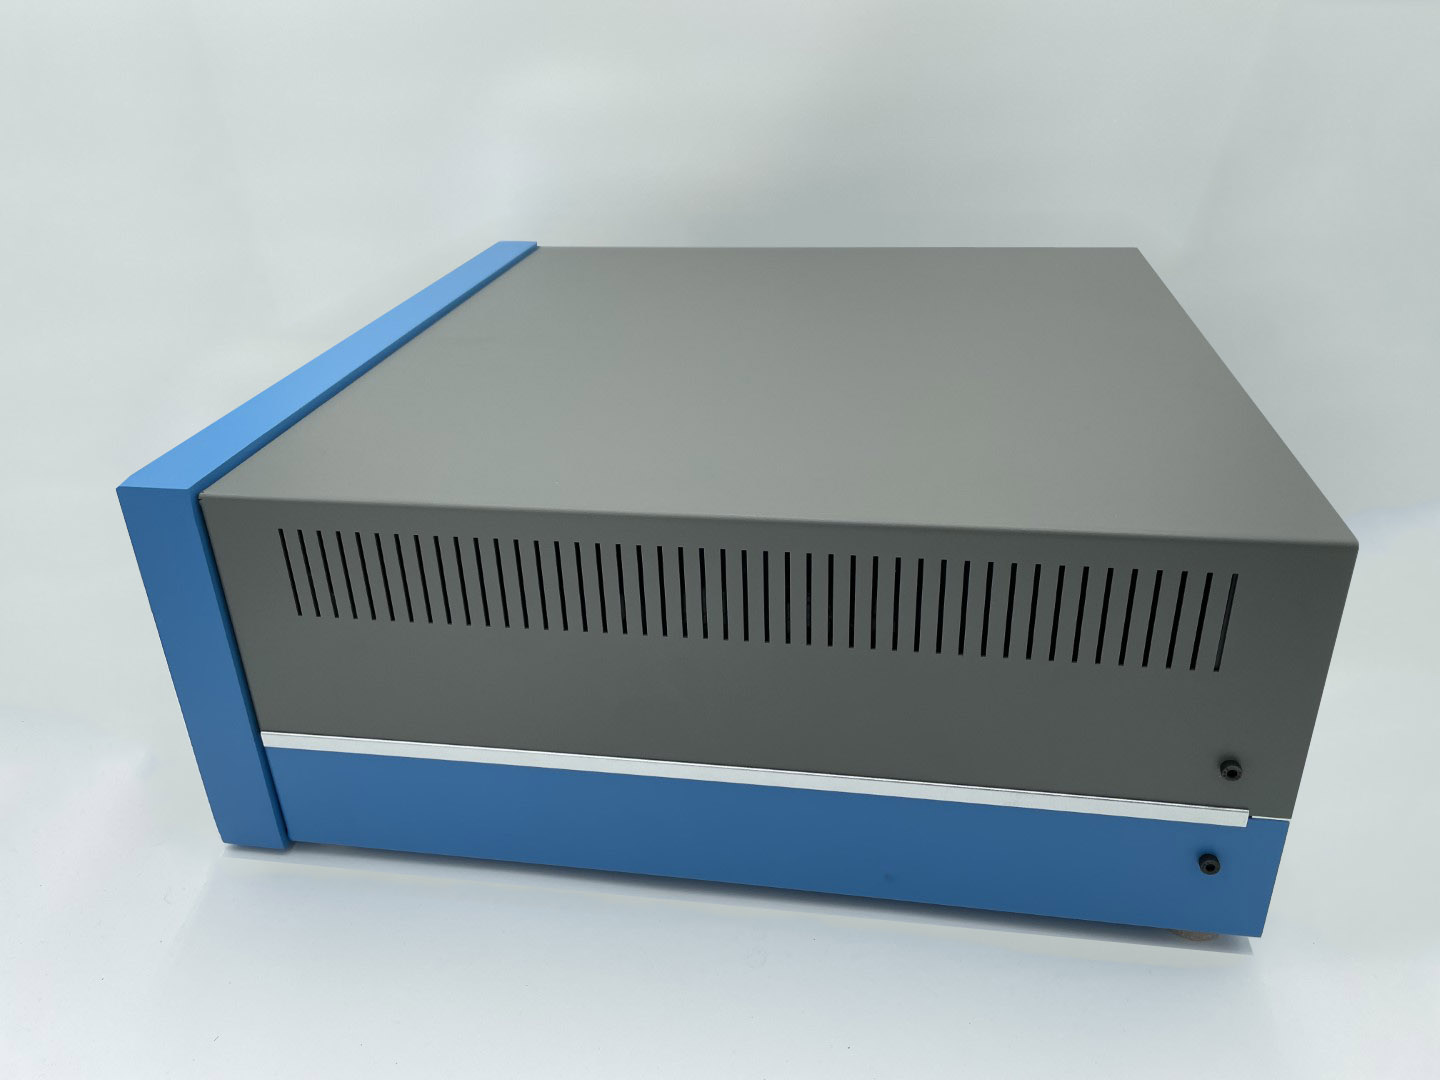
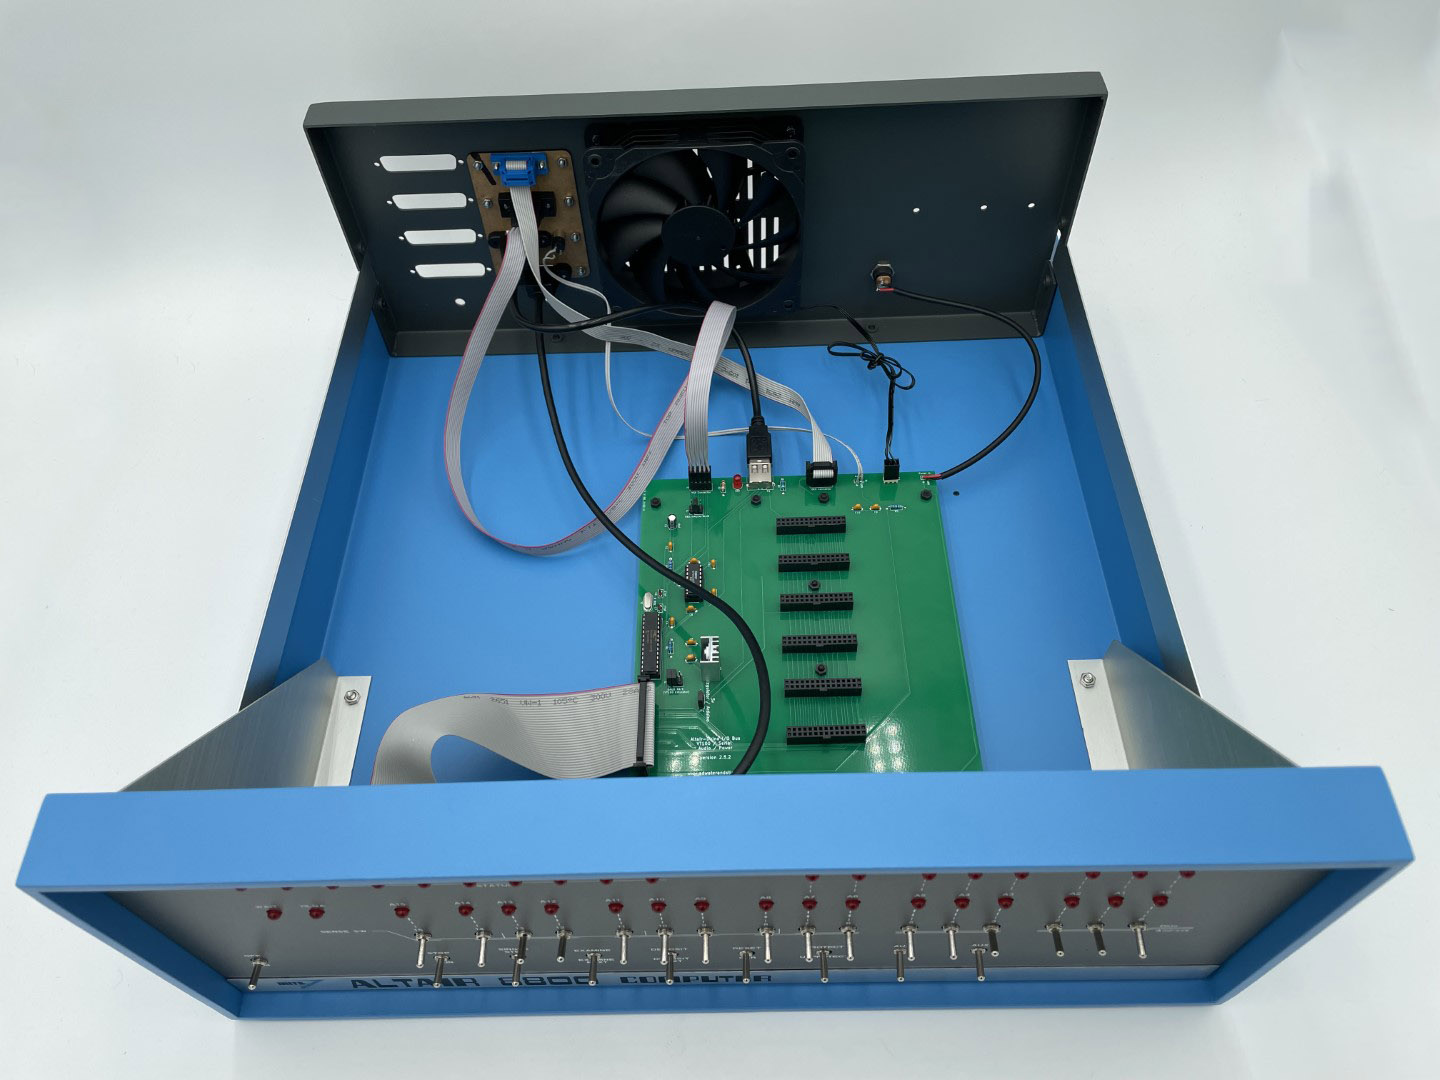
The main difference in the new 3.0 kit is the full size reproduction of the Altair case designed by Mike Douglas (deramp.com). It is the same dimensions (17″ x 7″ x 18″) as the original Altair 8800. It is made from aluminum and has a screen printed front panel.
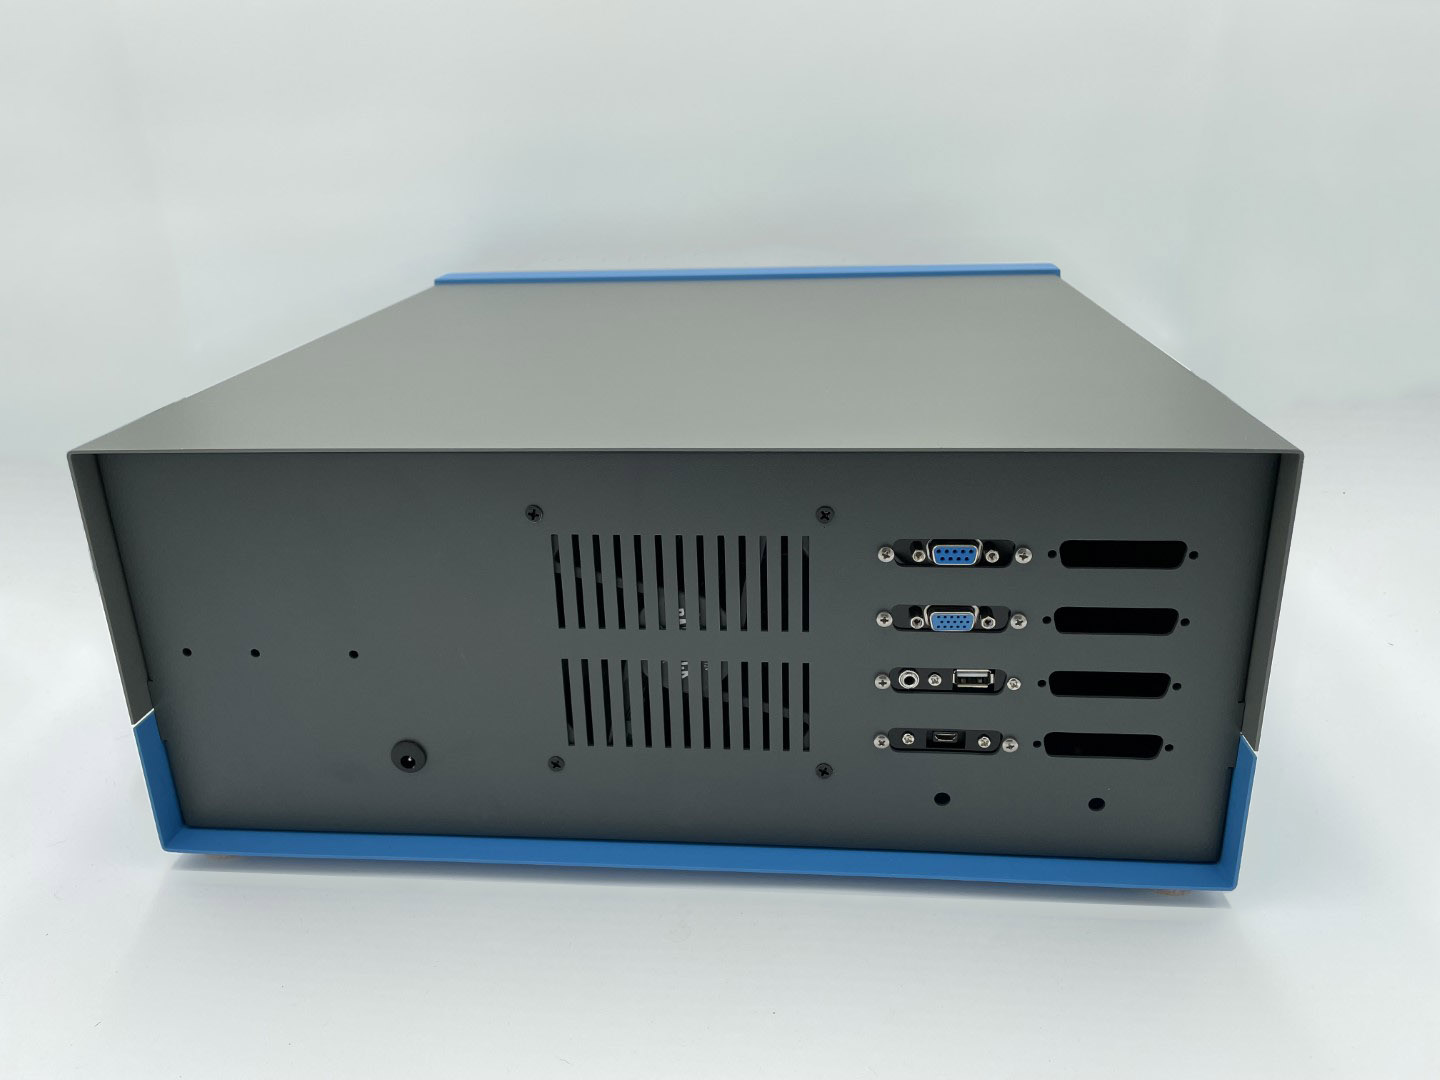
Also standard with the kit is a VT100 emulator (with VGA and USB keyboard support), DE9 serial connection, audio connection emulating a Processor Technology Music System card, and SD card slot for floppy drive/hard drive emulation.
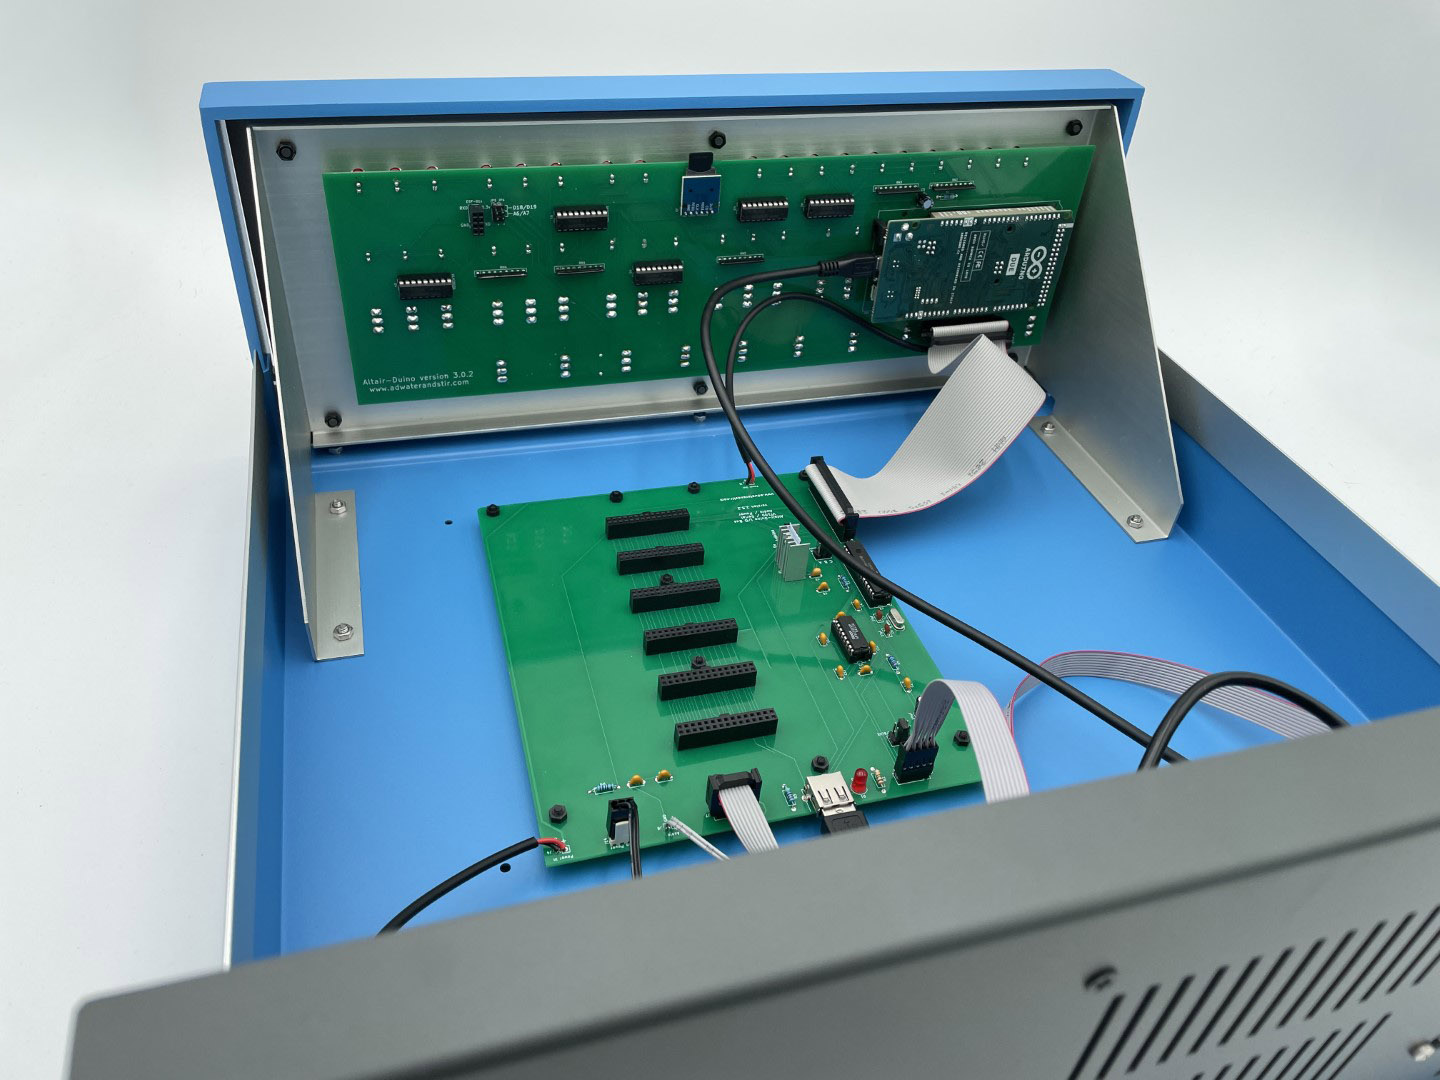
It includes support for David Hansel’s bus which enables the use of six expansions cards. You can read more about the construction and use of expansion cards here:
This is a beginner to intermediate kit for people with experience soldering. It can be built in approximately 5-6 hours. Please read the Build Instructions to familiarize yourself with the construction of the kit, and don’t be afraid to visit the forum with questions.
Since this is in a full-size Altair case, shipping will be expensive to international destinations. If you want to save on shipping, I highly recommend the new version 2.5 of the Altair-Duino Experimenter. This is a “shelf-friendly” kit that is cheaper to ship and perfect to display.
If you’re looking for just the Altair reproduction case to build your own Altair 8800c you can find that here.
What is the difference between the Altair-Duino Pro and the Altair-Duino Experimenter?
29 reviews for Altair-Duino Pro Emulator Kit
You may also like…
-
Altair-Duino Experimenter
$234.95 Read more

anymajordude –
Very easy to build as long as you pay attention to the instructions and advice. Nothing beats the pictures to verify what you’re reading. That was a good tip to install the LEDs last using the panel to align. I suggest the same panel alignment technique with the switches before they are soldered or you will be unsoldering and moving them. I know, I broke one. The PCB design is very clean with minimal jumpers. Definitely fun to take control the computer using switches like the old days.
matirwin (verified owner) –
I was able to quickly build the kit and had it working in a matter of a few hours. Well documented and well put together.
Brian Aberts –
Amazing kit. Had a bit of trouble with the header pins as outlined in the instructions, but i was able to overcome that with thinner rosin solder and a finer tip. The kit creator has great response time, is extremely helpful, and shipping time was rather fast!
Paul Spann (verified owner) –
Easy to build kit, well documented apart from the audio connector is not mentioned !
Led’s are too bright probably change the 150ohm resistor for 220 or 270 ?
Chris Davis (verified owner) –
I took your advice (and the advice of many others) and have replaced the 150 ohm resistors in the kit with 1k resistors. It has a much more pleasing look now.
derek.hofmann (verified owner) –
Likes:
L1: It’s beautiful! Even the circuit board is nice to look at. It’s truly a work of art.
L2: It’s fun to put together. It reminds me of the old Heathkit kits.
L3: Some extra resistors, LEDs, and standoffs were provided.
L4: It’s not powered by a Raspberry Pi, which would seem like cheating compared to an Arduino.
Dislikes:
D1: The LEDs are far too bright, especially in dim light.
D2: Don’t run your fingers along the bamboo frame or you will get splinters.
D3: You can’t easily access the SD card after completing the kit.
D4: The 12V power supply seems unnecessary when it works with only 5V connected to the programming port. Can anyone suggest a panel mount micro-USB or USB-B female port for the round hole in the MAX3232 rear panel?
Dave Britten –
The electronics are a piece of cake. It’s all nice, easy through-hole work with generous spacing. Just make sure you’ve got a Helping Hands or other means of holding the board at an angle, as you probably won’t want to let it rest directly on the components while you’re working.
I had a little trouble with the mechanical aspects, e.g. getting all the screw holes and the front panel to line up, but I’m pretty awful at carpentry, so my results may not be typical. In the end, it turned out looking very good, even in spite of my fudging and trimming to get everything aligned.
Took me about 4-5 hours in total, but everything worked first try, and I was able to boot up CP/M and play around with Ladder via Putty!
Tip: if you’re installing the rear panel, solder the power and audio leads BEFORE mounting the panel in place.
Chris Davis (verified owner) –
The rear of the project enclosure is laser cut now, so no more “woodwork” is required!
Charley Jones, PMP/MCDBA/MCSE/MCAD aka Dataman in Las Vegas –
Building an Altair has been a life long dream of mine. As a collector of computer systems, the Altair has always eluded me. Thankfully, this kit was simple, lovingly crafted, well packaged, and a step by step instructions with photos are very logical. Chris Davis has not only provided the look and feel of an Altair, but has also included every scrap of software he could find. It’s very simple to mount and boot a disk from an impressive collection. This is the kind of the kit and software I’ve been looking for!
Jason –
Great job creating this kit! I just finished the 1.4 version of the kit with the new 1k resistors, and the serial port option. The fit and finish of the kit is great and the PCB was clearly labeled, with good through-hole solder points. I soldered all the components over a weekend, and then put my attention on painting the bamboo case. Like others, I went with the Rust-Olium satin finish in Oasis Blue from Home Depot. It’s a hair lighter shade than the blue on my other Altair clone, but it turned out great and looks very authentic.
I used to be a bench tech (in the 80’s) so I’ve had some solder experience, but I think anyone with a good soldering iron and some patience will have no problem building this kit. I’ve tested everything except the DB9 serial port; sadly I can’t find a cable in my garage, so I’ll have purchase one. Bluetooth and USB serial work fine for now.
The SD card in the kit comes fully loaded with a bunch floppy images. I booted CP/M and played Zork, for old time sake. I also entered the kill-the-bit program in octal using the front-panel switches. The AUX switch trick to load kill-the-bits is clever, but it feels like I’m cheating. 😉
The kit looks nice next to my PiDP-8/I. If anyone’s looking for another kit to build, then checkout Oscar’s PiDP-8/I at Obsolescence Guaranteed. It’s another fun kit at about the same experience level. The PDP-8 is about a decade older than the Altair. Oscar has also just produced a PDP-11 kit, so old folks like me can go all the way back to our UNIX days, before Linux and GNU.
Mark Moulding –
I love the kit! I bought mine a the Vintage Computer Festival West, and assembled it the next evening in about three hours (I’ve done quite a bit of this type of work, so it went smoothly). The instructions are great, and the kit worked first time when I powered it up (with the exception of one mysterious issue that Frank P. is helping me with…).
I very minor niggle – the pad layout of single electrolytic capacitor on the board is backwards to the accepted convention (where the square pad is positive). It’s clearly labeled, both in the instructions and on the board, but I still had to check three times to make sure I wasn’t putting it in wrong…
The completed kit looks great, and with the laser-cut box goes together very smoothly. It’s easy to see the refinements in the assembly process which must have come from investing the necessary time to assemble a buch of these during beta testing – there were no surprises, and everything fit together perfectly. It’s earned a permanent spot on my desk, where it’s happily flashing away right now. And I must say, the price is *very* reasonable for a kit of this quality!
Andrew –
Awesome kit!
Reminds of the days I used to do Heathkits. Documentation was great and the entire kit was very easy to put together.
I’m having fun rediscovering computers with just basic hardware and fundamentals (my first computer was a Commodore VIC 20), it’s a nice break from todays technology. It makes you appreciate have far we come in a relatively short period of time.
Keep up the good work and I look forward to some of the other kits (Apple 1 especially) you are thinking of doing.
Kent Stroker –
Nice to see someone took the time to create such a well-crafted kit – look forward to your having them in stock again.
Dave LeJeune (verified owner) –
At age 81, my eyes are a bit worse than when I built my original Altair (Mar, 1975), but I successfully built the duino! Only issue was a solder bridge on the DUE socket that kept SW 11 always on. Took a while to find it, but finally did it. Lots of fun and really brings back memories. Had one bad switch, and I had used it in the on/off position. Chris quickly replied with not one but 2 switches – less than 4 day turn-around.
Dave Cook –
Wow, what fun! My summer job when I was going to college for my EE degree was as an electronics assembler and those skills were perfect for building this kit. The kit is so well crafted in both the mechanical and software engineering. I did a lot of assembly programming with the 8080 on my first job after I graduated but never had the luxury of owning an 8800, so this was just a dream to tinker with after it was completed. So amazing to fat-finger 8080 code in via the panel switches, and even more amazing to be able to load the CP/M disks from the SD chip. The emulation is superb and Chris’s kit is a work of art.
Stephe Koontz –
I first got the earlier 1.4v kit with the bamboo case, and recently upgraded it to the acrylic case and VT100 emulator. It’s so much more fun to use with a PS2 keyboard and VGA monitor as a stand alone than having to use the older version connected via USB to another computer. Awesome quality and great customer support if needed. Highly recommend!
R. B. Helms (verified owner) –
Am encouraged with your careful attention to feedback (LED brightness and other mods). Looking forward to building mine! Hoping to hear shipping confirmation soon!
Richard Helms (verified owner) –
I found it very important to very closely check parts placement with the copious picture illustrations prior to soldering, as I misplaced some parts getting capacitors, connectors and pin headers put in the wrong places, as well as (totally my fault) soldering 10k resistors where the 1k should’ve gone. I’ve gotten prompt service for replacements, and expect the last gaffe I made (requiring a replacement capacitor and missing resistor) to be resolved very soon now. The instructions have failed to list values for some components (why I goofed a capacitor) and as well seemed to assume the picture was all necessary to show the header placements on the VT-100 board. This is my only criticism. The boards are very neat and well laid out and it’s easy to solder without intricate care needed to avoid solder bridges (save for with double-row headers).
Richard Helms (verified owner) –
For those who’ve not watched the build video, these are the extremely helpful points I gleaned from watching:
1) Bend resistor wires across the circuit board, its thickness is a perfect measure of the distance between the edge of the resistor and where the bend needs to be on each side.
2) Solder in resistors (and other close-spaced components) every other one so you have room to work, then clip after soldering and do the remainder.
3) Read instructions carefully, paying particular attention to what components go where (and how they go for polarized parts like transistors, electrolytics and LEDs) before soldering. Check what you’re about to do against the pictures (and on-board silkscreening) before committing solder to the job! The silkscreen often shows values for the components, so this too is a helpful detail (that not all kits have) that assists doing a “sanity check” during the placement phase.
Seaprimate Jenkins –
I have the pro version with the acrylic case and VT100 emulator. Amazing product! Fast shipping! Took about 6hrs total to build. Very unambiguously labelled pc board. The build guide gives tips to build that’s based on previous issues so you don’t repeat them. Extrapolating from other comments, it seems they’ve listened to the feedback and improved the product over time. I don’t see one complaint of previous versions that they haven’t addressed in this current version! Very happy I bought this. They are an amazing company!
antonio (verified owner) –
it is simply a dream come true. the quality is unbeatable and everything is very well documented.
Alexander Rowsell (verified owner) –
Absolutely awesome value for money. I bought the regular kit, it’s currently $30 off, which is a great deal! Shipping to Canada was relatively quick (though I was impatient as I wanted to flip switches and play with it!).
I have quite a few years of soldering experience and work in embedded systems design so my experience may be different than what a newbie would have. Took me about 2 hours in total to get everything soldered together. I probably could have done it faster but I decided that every resistor had to face the correct way and every switch had to face the correct way also, heh. Silly as you can’t even see that side of the board once installed.
If you have never soldered before, this might be a daunting task. But if you have any experience with electronics soldering, you should be fine. Go slow, don’t rush. Follow the tips in the guide, they will make it much easier if you have little experience! Remember that there’s no requirement to solder it all in one sitting. Make sure you have decent ventilation. I happen to like the smell of my Kester solder but even so it was getting a bit overwhelming after about 90 minutes. Had to up my normal ventilation by adding a second fan. With the amount of solder you use in this kit, your hands will be covered in lead residue, as well as flux residue. Make sure you wash your hands very well before eating/touching your face too much!
On to the kit itself — exceptionally well designed. I noticed that the PCB layout was done to mimic the hand-drawn “taped” look of PCBs from that era. It’s hard to tell if it was actually taped by hand or if they just used CAD software with some free-form layout tools; either way, it’s a well routed board. The pads are all correctly sized (a mistake I see too often in kits!) which is perfect. The only complaint I have, not even really a complaint… the holes for the switches are *very* tight-fitting. I felt like I was pushing pretty hard to get them seated properly. The benefit of this is that they hold themselves in position for soldering, which is handy as you need to really flood those switch contacts with solder. On the other hand I almost felt like I was going to crack the FR4, but that’s probably me just being overly cautious. The PCB is decently thick and it’s probably not a big deal — but perhaps increasing the hole size by 0.1mm or so would help?
The included SD card is excellent — tons of fun stuff to play with. Easy to get up and running. Make sure you find the Documentation.pdf file — it took me a bit of exploring on the website to find it. It’s not part of the assembly instructions, it’s a separate file. Another suggestion would be to put this link on both the kit page and the store page for the kit to make it easy to find. But, once you have that, it’s very easy to use. It can be powered over the USB connection, so plug it into your laptop and bam, it’s up and running with a serial terminal connection easily made.
10/10 would buy again.
Jordi Parera (verified owner) –
Received and build in just a couple of hours. The instructions are easy to follow. The kit is impressive!! high quality. All perfect!!
Looking for the Kenbak-1 now!!!
Thank you so much for this amazing replica.
Jordi
Richard Gore (verified owner) –
I enjoyed building this kit thoroughly. Very high quality, and precision manufactured.
I love the look of the finished product, it’ll make a very nice conversation piece at home 🙂
I now need to learn how to program this and have fun with it.
Bought the Pro version with the case and the VT100 board.
Highly recommended for anyone who loves computers and electronics 🙂
Johan Lammers (verified owner) –
Very much enjoyed building the Pro kit. The layout of the pcb-s makes assembling them very doable; with a reasonable soldering iron and a decent amount of patience it can also be build by someone lesser experienced. Practically running in one go.
The black backplane of the case does not fit comfortably; the bolt holes seem to be about 1 – 1,5mm too far to the left but this can easily be fixed with a small drill. Glad this is the version suited for a USB keyboard.
All in all a very nice product. Playing around with the finished kit brings back (very) old memories…
Chris Davis (verified owner) –
Glad you enjoyed the kit. For those building the kit in the future: If your holes for the rear panel cover do not align, you have the rear blue piece installed backwards. Remember, the notch cut into the opening for the rear panel *must* face to the right (on the side by the VGA connector.)
Jason O’Keefe (verified owner) –
Took me about 10 hours straight to build/solder everything on the pro version. Kill the Bit runs and the examine address lights up the leds. A lot bigger project than i expected seeing reviews of people building this in 4 hours. Totally worth it, buying a fully assembled kit is definitely a bargain but i guess since this is an emulator i felt obligated to at least solder it together myself. Thanks looking forward to hooking it up to my PC
Belknap K –
I received the Altair-Duino 8800b (Pro, with the IO Expansion) on time from the vendor (Famous Davis LLC / adwaterandstir.com ) in mid-May, 2022 (delivered to the New England area of the USA, where I live).
Packing was pretty good! No complaints. Attention to detail was paid by the vendor, during prep for shipment.
The Altair-Duino 8800b is a very nice setup (this one shipped pre-built by the vendor). Grabbed it because I wanted pre-built and expected them to go out of stock.
The vendor did an amazing soldering job. Very happy with the build.
The IO Expansion board comes somewhat unpopulated in this version – more than one pin header sets are missing (not soldered in, but the solder pads are there). Could be the design has changed. It’s fine; it’s just something I noticed (took it apart of course: since I didn’t build it myself, that was the least I could do. 😉
I’m guessing that it’d be just fine to solder them in myself, should the need arise (unlikely; everything I think I want from the unit is already working great!)
Did not test the SD card slot for this review, nor the Audio jack nor the DB-9 serial port.
Tested: the DB-15 (VGA) port, the USB-A jack (USB keyboard for VT-100 emulation) the USB microB jack (for interconnect with a host PC) and the 2.1 mm DC barrel jack (for 5 VDC in) (tried 8.2 VDC initially).
Extensive testing of front panel switches (low bits mostly) and all function switches except for AUX2 and PROTECT/UNPROTECT.
I got the one with the clear acrylic top; can’t really see through it (though almost!) with my eyes and prescription. I would need to remove the top to see the silk-screened legends (on the IO Expansion’s PCB) sharply enough to read them. In other words I can’t get my eyes at just the right distance to fool around with it, without dismantling the unit (remove front panel entirely).
Which I’ve done once, already. Requires a Torx fastener tool to open the front panel, I think (again, my eyes; I believed my fingers when they said ‘this is working, it fits, it’s turning – nothing is stripped, keep going).
It’s either that, or hex (allen wrench).
I have not managed to load my current-limiting power supply above 210 mA no matter what I do (though I do keep it at 5.2 VDC, center positive 2.1 mm barrel plug from the PSU output terminals). It’ll trip during boot, so I usually let it trip, then reset the bench supply, which allows the Arduino Due-based design to boot normally. Then I setup the bench supply for overcurrent protection (‘OCP’ on this garden-variety Korad KD-3005D bench supply).
The schematic on the Due is suggestive of a new power section that is most efficient at 5.0 VDC input (on VIN). I’m running it at 5.2 VDC (at the 2.1 mm barrel jack on the IO Expansion board at the back of the unit, switched through the front panel) and it’s just fine.
The Altair-Duino 8800b will run solely from USB power (from a host PC or dedicated USB-A power supply @5VDC).
When I want the IO Expansion’s VT-100 capabilities, I use the bench supply (at 5.2 V) feeding the 2.1 mm barrel jack.
Or (still with the IO Expansion’s VT-100 terminal) I’ll use a cell phone’s USB 5 VDC ‘charger’ supply fed to the USB micro-B connection (Arduino Due Programming Port).
When I need a wider terminal (about 98 columns, on a desktop Linux PC) I go with the (Linux desktop host PC) USB connection (shows as /dev/ttyACM0 – bog-standard Arduino CDC/ACM connection).
STOP+AUX1_UP gets you into the Config menu (without a cold boot), just as bit 0 UP and DEPOSIT gets you a terminal you can work within (on a cold boot) using the IO Expansion on the VGA DB-15 and USB keyboard (USB-A) jack. A Dell keyboard worked fine; it’s an L100.
The Linux build of the firmware shouldn’t be overlooked (it will also run on Windows, and probably a Mac as well).
With it, you can design and test firmware (once you get the hang of the Altair-Duino, you are not required to keep flippin’ front-panel switches till Kingdom Come, if you use the Linux build as well).
The Linux version saves memory images to a disk file (on your real hard disk of your host PC) and it also displays Intel Hex format, as well as 16-byte-per-line dumps (in hex, octal or decimal) .. and .. decompiles your code (line by line). The .HEX dump is a screen capture (I did not notice if there was a mean in Linux to directly save it to disk).
That’s what ‘script’ is for (in Linux). 😉 The generated ‘typescript’ logfile is good enough to recover this kind of information (the screen-only displayed .HEX file dump).
With practice, I’ve learned not to lift the unit by the ‘STOP/RUN’ switch when resetting (‘STOP+RESET’ switches fairly widely separated). I just tested .. I was really gorilla’ing it to lift it off the desk like that (this unit – the 8000b – has the flat baton switches, which are all spring-loaded with center-off, for all eight function switches; the others are SPDT toggle (they stay where you put them).
The 8000b artwork is very nice – I like it a lot! Not razor sharp at all, but for my uses it’s just wonderful (I don’t see that well; it’s a concerted effort to see it well enough to notice the lithography/whatever isn’t all that crisp). I honestly would like to have both (the original ‘plain’ artwork and this new one) to try ’em out and see which one I’d prefer for a daily driver experience.
A lot of my time with the (physical) Altair-Duino 8800b is spent thinking .. and looking .. but not reaching towards, and touching the unit (to run those switches!) The bit-flippin’ switches are good enough for the purpose, and the discovery of how to use a keyboard more effectively has set aside any worries about repetitive stress, sore fingers, or the possibility of a switch’s mechanical fatigue/failure.
Wouldn’t want to go without ’em. Gotta have them switches. Part of the experience. Leads to a different way of remembering the facts with regard to the system’s programming.
There’s reasonable keyboard support, as-shipped (either using a terminal, or the built-in VT-100).
You do have to make a firmware change (just recompile in the Arduino IDE) to get the full ‘standalone’ experience (the system would then obey the ‘/’ keybinding, to let you enter your numbers directly on your terminal’s keyboard, like the Linux version already does) (possibly by default in Linux; not sure if I changed it or not, to make it ‘STANDALONE’).
Once that’s done, hand-coding is fast if you have a code dump handy (in Octal or in Hex). Set it up for Octal (or Hex if you must) and just /ooo iteratively (or /hh for hex). So if you wanted to enter 0x78 you’d either (in Octal) /170 or (in Hex) /78 to set up that byte (exact same outcome as if you’d done the bit-flippin on the front panel switches).
There’s a brand new RP2040 based video solution in the works (see the Forum for June, 2022) but it’s too soon to tell who/what/when/if it’ll be offered as a kit.
The video on this one is almost marginal. I’d give it a ‘B+’ (on the ABCDF scale from school in the 1970’s). The left-edge was obscured on both LCD’s tried (good ones). One fell into adjustment (just fine!) and the other display was unusable (a decent NEC display, though a bit old). Some columns of printing (of the 80 intended) were scrolled off past the left edge of the display, on the problem (LCD) unit.
I’d call the experience of using this VT-100 emulation somewhat authentic, and quite useful. With my eyes, I need more; the Linux machine with its large HDMI display does the job, via the USB micro-B port (Programming Port) on the Altair-Duino. It’s also just plain fun to see it (and use it!) as a stand-alone computer.
Much of the value of the kit is in the front panel (as well as the IO Expansion card, if you get the Pro kit). That’s a lot of design work, PCB fabrication, parts procurement. In principle you could do all of that yourself, and say ‘after all, it’s an Arduino Due based design’ and the software is already on github, to do it that way.
I went the other way: I had them also build me one (okay, it was built when I saw it on offer, and built before I thought of visiting here again, on a random check-in, inspired by a short conversation on a BBS about the Altair 8800).
Mikka Trung (verified owner) –
Awwwwesome purchase! This Altair kit is very easy to assemble, even for a noob like myself. My advice is to use the right solder and watch online videos, YouTube is your friend. I like this kit so much that i’m thinking of buying the limited edition B kit. Highly recommended seller, fair price considering the chip shortage, and extremely fast postage to Melbourne Australia. It literally took 7 days, and this was during the covid lockdown.
5 blazing 🌟
Julien Simon (verified owner) –
Amazing kit. I’m not a soldering pro, but I managed to build this without any particular problem. The forum is friendly and helpful, don’t hesitate to ask questions. The Altair and its VGA monitor are now on my desk, and they put on a smile on my face every time. BASIC, CP/M, games, etc. Perfect time capsule from the late seventies 😀
Ryan Harbrige –
Awesome project to build. I really enjoyed putting the kit together, just like my dad put the original Altair kit together.
Sebastian (verified owner) –
Great kit! Shipping was fast via UPS option (US -> .DE).
Very well packed and assorted – easy to assemble.
Quite refreshing to see something like that done without the usual “Pi” 😉
Thank you for making this affordable kit!