Before you can do anything (other than watch the blinkenlights) you’ll need to connect your Altair 8800 to your computer via USB. Note: the Altair-Duino is powered immediately upon connecting to USB, the power switch is not used in this configuration.
Requirements:
Terminal software (Putty is highly recommended.)Step-by-Step:
- Plug USB cable into computer with the other end connected to your Altair-Duino. (NOTE: the power switch is bypassed when connecting via USB – your Altair-Duino will default to a powered-on state regardless of the position of the power switch.)
- Windows 10 should automatically recognize a new serial port. To check , launch “Device Manager”.
- Expand “Ports (COM & LPT)” in Device Manager

- Your port should be identified as “Arduino Due Programming Port” (it could have a different name if you had a different Arduino-compatible driver loaded prior).
- Launch PuTTY (or another terminal program if you choose.)
- Connect to the COM port indicated by your Device Manager at baud rate 115200.

- The front panel lights will flash briefly while it connects.
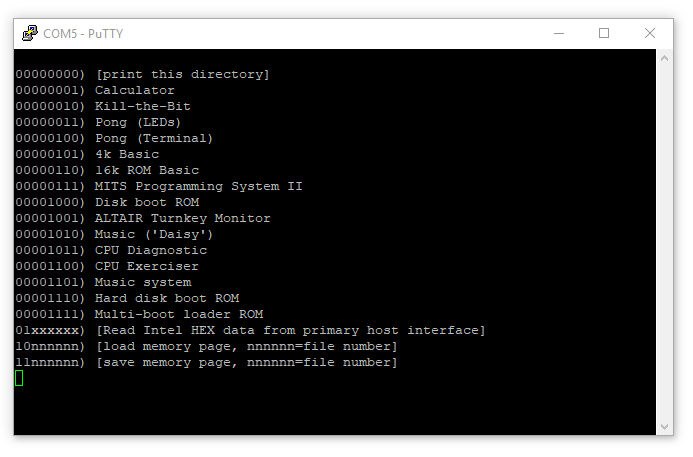
- With all switches down, press AUX1 down.
- On the terminal, you should see a directory of options for front panel switches.

- Try getting a list of disk images on the SD card.
- Raise SW12 (all other switches down).
- Press AUX2 down.
- On the terminal, you should see a list of disk images.
Now that you’re connected to the Altair-Duino, I’d suggest setting it up so you can Easily Switch Between Serial Devices.
